Haha! It’s finished – the version of the grand staircase from the first two Potter films! Join me for a complete video tour!
To get us to this state of completion, I had to add the remaining doorways on the landings:
Then came the big window at the back. Much of the molding is taken directly from that Oxford design I created in the last post. The scene beyond the window is a bit of a cheat…I just did a nighttime render of part of the main castle model, blurred it, and dropped it in like a scenic backdrop in a real set or miniature. It’s not perfect but it gets the job done.
With these elements in place, the only thing remaining was the paintings…but I decided they’d be too much work, I’m omitting them, at least for the time being. They don’t have anything to do with my main purpose (understanding the geometry of the stairs) or my secondary purpose (examining the scale of the space).
Speaking of which, here’s the long-awaited scale comparison between the castle exterior and the grand staircase interior!
They kinda almost fit together at the intended in-universe scale! Of course, if you include all the digital extensions at the top or the extra miniature passes used to extend the bottom, that all goes out the (beautifully mullioned) window. But I think that’s kinda okay.
This concludes my work on this side project…it’s been a fun one! Now back to the main castle model.
Let’s take a detour back to the moving staircases of Hogwarts! Thus far, as seen in this post, the environment has been very generic – just a tall rectangular space of the correct dimensions. Let’s fix that.
The biggest problem – we’re talking physically biggest – is that there’s supposed to be an extra chamber in the bottom section where the big window goes. Even if I’m not going to add the window yet, I can at least add that chamber:
Notice also the addition of a blue screen floor. This sits at the floor level of the actual set and also corresponds roughly to its footprint. Below that, I’ve lowered the main floor to reflect the slightly greater depth of the miniature. This is important because I won’t have room for the whole window if I leave the floor at set level. (The window only existed in the miniature, as far as I’m aware – though that changed in the redesigned Prisoner of Azkaban set.)
Next step is to hide the blue screen floor and add the lamps that help light the space:
(None of this is intended to look as realistic as the main castle model…the materials are very basic and these are just quick renders with Blender’s Eevee engine, which specializes in speed at the cost of physical accuracy.)
With lamps in place, let’s start adding the passageway that leads to this room from the Great Hall/Chamber of Reception area. (This was not part of the miniature as far as I’m aware, but it most definitely was part of the set.) This area is interesting because the production design draws very heavily on the real world – specifically, the steps at Christ Church Cathedral at Oxford, where the Chamber of Reception interior scenes were shot. You can see this most clearly with the large stone arches, which were built to match the ones at Christ Church, tying the sets and location shoots together into one shared imaginary space. The doors to the Great Hall set use the same arch design as well…a fact I’m grateful for, since the Warner Bros. Studio Tour was kind enough to post detailed drawings of those doors. You can see the same design on the castle exterior model as well, though I haven’t built those parts yet.
As always, things start with a confusing mess of intersecting curves that gradually coalesce into something more recognizable:
One of these arches is used as the entryway to the main room with the moving stairs:
Nice to be able to duplicate the design as needed:
Those rather ghostly outlines are caused by the same “backface culling” feature that allows us to see into the rooms from outside.
With more walls, details, and openings coming together, this area is starting to look quite a bit like the set…
…minus all the paintings, of course. As I see it, I have three basic options with those. In order of increasing difficulty:
Pull a Filch and omit them entirely.
Scatter the walls with a variety of paintings that look right overall.
Try to match the paintings seen in the films, frame by frame, painting by painting (and fill in the gaps with option 2).
I’m currently sticking with option 1, but who knows?
In any case, there’s still more work to be done here. I need to add the rest of those smaller arched openings throughout the room, and I need to add the large, ornate window on the opposite side. Look for those in a future post! I also still hope to do some videos and scale comparisons and whatnot once this side project is complete. I might need to invest in a new GPU before then, since my current equipment is crashing if I try to render any more lamps with Eevee…
As we’ve seen, POA featured some significant additions to the castle’s architecture, many of which were anchored by the new clock tower in the southwest corner. The last remaining piece of this section was the small gatehouse at the end of the wooden bridge. This came together easily; the only real question was how big to make the torch, since its size (relative to the building) differs significantly between the miniature and the full-sized set built at Glencoe. I ended up using the same scale as some of the castle’s other torches, which resulted in me kinda splitting the difference between the two sizes.
Believe it or not, that brings the POA additions to something of a complete state!
The south wing as a whole is still not complete, since I haven’t touched the quad interior due to scarcity of reference material. I also still need to add the walkway that connects the Chamber of Reception to the quad, but I’m holding off for the same reason.
Knowing this, I decided it was just about time to turn my attention to the castle’s north wing, much of which is derived from Durham Cathedral and Alnwick Castle. There were just a few odds ‘n’ ends to finish up first, like the fleur-de-lis pattern at the back of the Great Hall (bottom right):
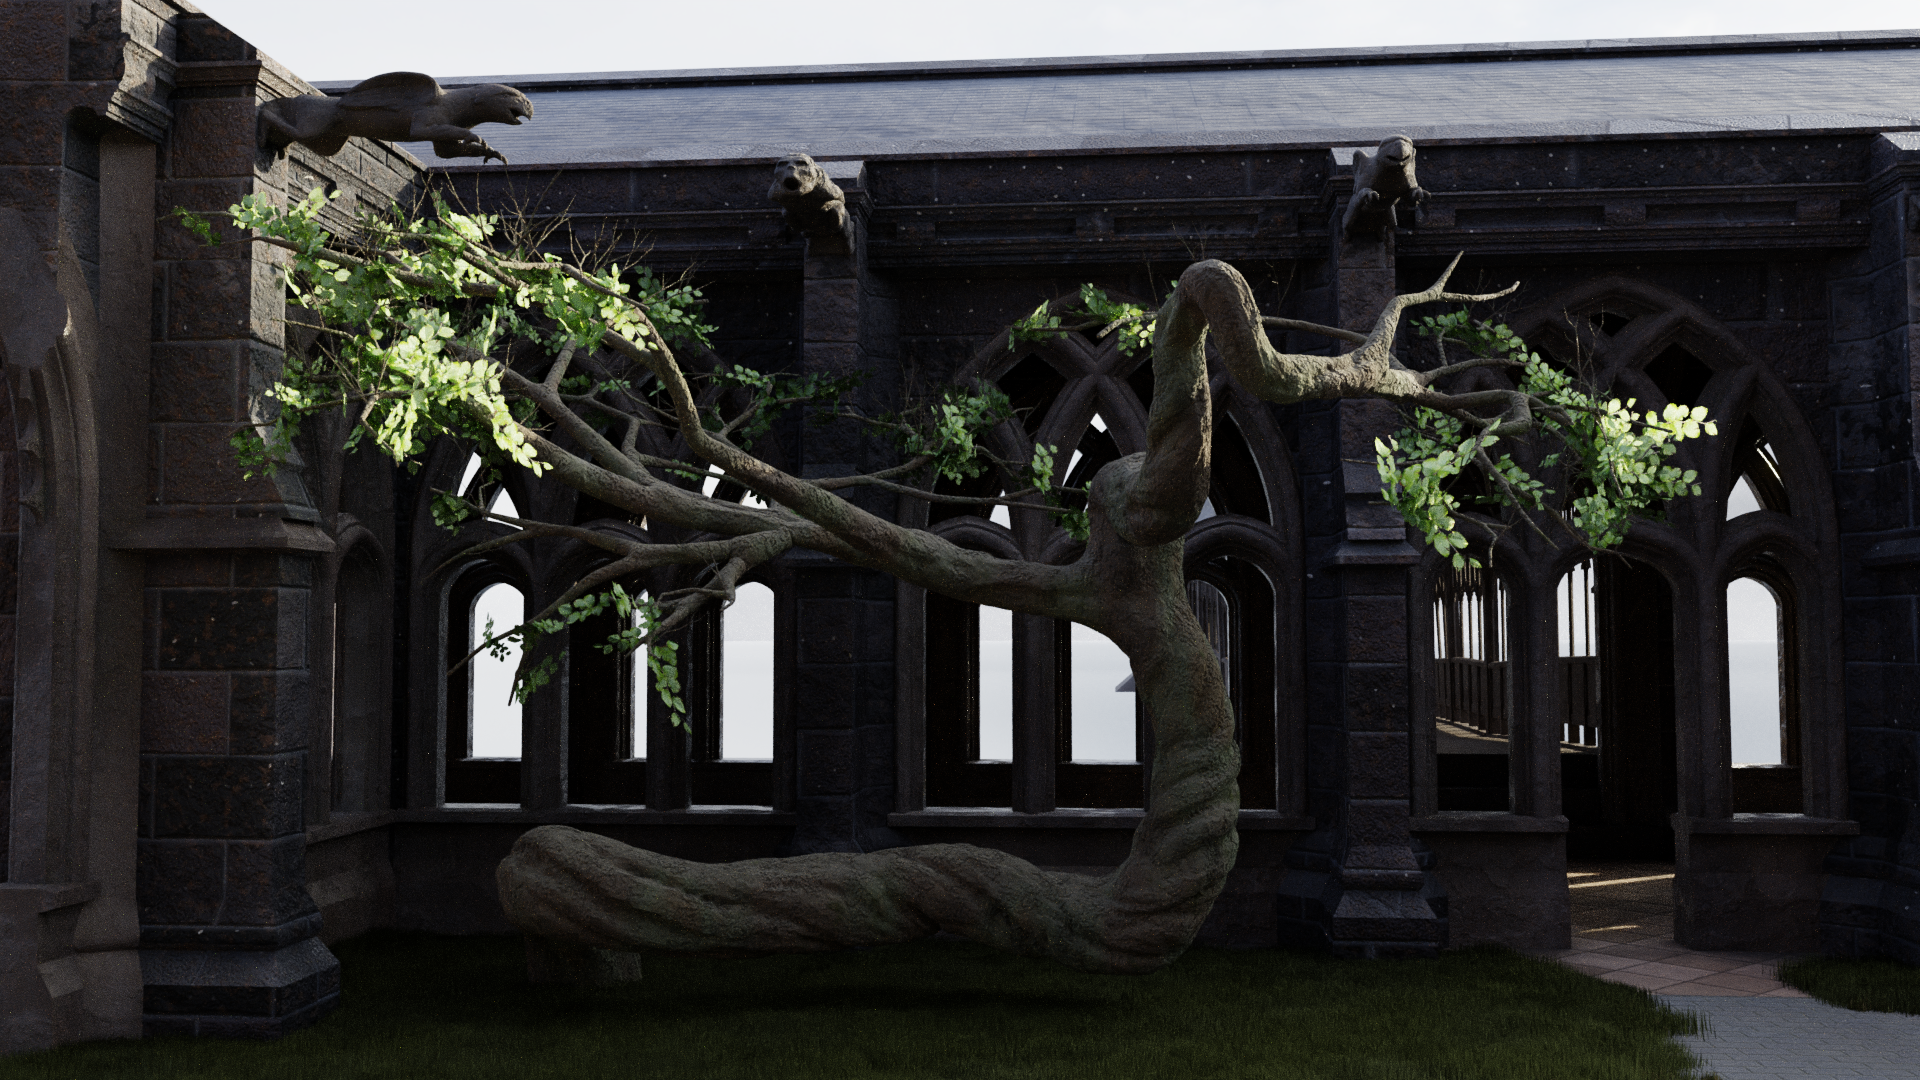
Another miscellaneous item was the tree in the clock tower courtyard where Buckbeak’s executioner sits to sharpen his blade. It was fun creating its forking, branching paths by hand, following what we see in the film for the trunk and larger branches, then just going crazy with the smaller branches. I allowed Blender’s Skin modifier to bulk it all out into a basic three-dimensional form:
Whoops…I realized I’d forgotten to add the steps leading up from the courtyard to the wooden bridge. I added those, sculpted a bit more detail into the tree trunk, and used a particle system to add some leaves.
Next came ivy to help the courtyard feel a little more overgrown and wild:
I also spent some time grappling with Blender’s Mantaflow fluid simulation engine, trying to get convincing smoke to furl from the castle’s chimneys. It took the better part of a day for me to figure out that my baking errors stemmed from an apostrophe in the cache folder path (a folder descriptively named “Joe’s Stuff”). With that finally resolved, I was able to get some smoke in there:
After all the frustration, I really like how it turned out! I think that’s a nice note upon which to end the work on the south wing, at least till I can find more reference for the POA-era quad. Next we turn to the north wing, starting with the Durham section!
With the basic structure of the wooden bridge in place, I next set out to adjust the support beams below. The bridge spans a ravine and its cross beam patterns do vary. Paying close attention to their arrangement in the original miniature, I first modified the half closest to the castle:
Then it was just a matter of duplicating the structure to the far side and tweaking a spot where it’s not quite symmetrical:
This brings the bridge to a complete state…at least, without all the shaky imperfections that give the original its charm. Time to get those in there.
My weapon of choice was Blender’s Mesh Deform modifier, a nondestructive tool that allows you to manipulate one object’s shape and have it affect the shape of another. I created a much, much simpler version of the bridge – really just a 3D envelope to roughly surround it – and manually pushed different sections around to approximate the swaying structure seen in the films. Blender obligingly shifted the detailed model of the bridge to match.
Just for fun, here’s the simplified envelope visualized with a translucent material around the actual bridge model, prior to any distortion:
And when I warped that envelope (twice due to some annoying lost work), it made the detailed bridge underneath look this!
(This is after breaking apart the roof into some separate chunks with their own local coordinates so that the shingle texture would map correctly onto them.)
I’m feeling quite happy with this! It’ll look a lot better once I’ve added terrain, of course. And even just adding the gatehouse at the other end will help. I think that’ll be my next task.
Possibly the most noticeably new castle feature in Prisoner of Azkaban was the long, rickety wooden bridge leading from the new clock tower and courtyard to the new location of Hagrid’s hut and the Whomping Willow. (The bridge stuck around all the way through to Deathly Hallows, when it was enlarged to make its destruction more dramatic.)
As with so many things, it’s easier to build something like this in its original pristine state and then deform it appropriately. So I set out to create a perfectly straight version of the bridge with none of its characteristic undulations:
Not very recognizable yet. Adding the roof and a few more elements helps a lot:
That’s more like it!
As I began to add the trestle structures below, I threw in some textures as well:
This all came together pretty quickly, in part because everything you see above consists of a single 8-foot-long segment with an Array modifier that dynamically duplicates it 24 additional times. Then it was time to move the bridge into place as I continued to add details:
Thus far, I’d avoided all the wooden tracery that gives the bridge its ornate look. There are actually two designs used on different parts of the bridge, something I’d never noticed before. I recreated both:
Next steps will be to adjust the bottoms of the supports to match the ravine below, adjust the texturing on the roof, and ultimately bend and twist the segments of the bridge to give it its final wobbly look.
Short post today. I finished the clock tower! The only two pieces I still needed to add were the big window in back and the enormous pendulum that hangs down through the entry. Both are now in place! (I’d avoided the window for ages because I couldn’t find a clear shot of the tracery. Then I randomly came across a shot of a window at King’s College Chapel and realized that it was the exact same design. Problem solved!)
Around the other side of the building, I’ve been really hesitant to finish the hospital wing because the placement of the detailing toward the bottom will depend on the detailing of the surrounding quad walls, and I haven’t been able to add those due to insufficient reference. But I bit the bullet and at least took care of the top section:
I’ll still need to add the windows and so forth down below once I’m able to complete the quad. In the meantime, I’m gearing up to probably tackle the (gulp!) wooden bridge next.
After creating the major building blocks of the clock tower courtyard, it was just a matter of carefully putting them all together. Here’s a first render with the modeling all finished:
This, of course, is the courtyard in relatively pristine condition, but it’s supposed to be rather run-down and overgrown. As with the fountain, I used Boolean modifiers to knock out chunks of the appropriate walls and arches. The great thing about this method of destruction is it’s…well, non-destructive. Everything is still there – it’s just hidden.
As I added some different ground textures, I also started layering in vegetation – a first for this project. Blender’s hair simulation allowed me to grow pretty satisfactory grass along the courtyard. I weight-painted the distribution so so it would clump around the fountain, walls, and columns. This clumping does vary between films and between sets/miniatures; I aimed to split the difference in a way that felt natural. (I haven’t worked much with particle systems…imagine my surprise and delight when I discovered that my render times barely took a hit!)
It’ll need more work, but it’s more grass than I had before!
Let’s return to the clock tower courtyard. With the fountain in the center finished, I decided to now enclose it with the courtyard itself. Existing as a full-scale set and as miniatures at 1:24 and 1:10 scales, the courtyard was designed for the third Potter film and is surrounded by aged cloisters and overgrown vegetation. There’s a lot of complex geometry to capture. I compared photogrammetry, production stills, technical drawings, film frames, shots from the Warner Bros. Studio Tour, the similar courtyard in front of the castle in films 4-6, the larger version thereof in the final film, etc., etc. Eventually, I felt like I had a decent understanding of the space.
One thing I’d never noticed before was that there are actually two different designs to the arched tracery of the cloisters:
The one on the right is taken directly from Durham Cathedral, lending stylistic unity with the location shoots from the first two films. I’m not sure if the one on the left is taken from a real-world location, but it’s certainly very similar to a lot of real Gothic tracery out there. That one is used primarily in the sections of these cloisters without a roof.
As with the fountain, my first task was to create the courtyard in a more-or-less pristine state, without any of the damage or erosion to be added later. (Adding the ground is a logical last step so I don’t have to worry about it blocking my view of the blueprints beneath the model.) Notice how the last arch on the right has the Durham tracery design:
The courtyard has elongated gargoyles placed at intervals around its interior, and while they look similar, there are actually two designs that alternate: a hippogriff and a centaur, although they’re so stylized that I had to study them for a while to figure out what they were depicting.
When they repurposed the clock tower courtyard set for the viaduct courtyard after Prisoner of Azkaban, they kept these gargoyles in place, providing a lot more visual reference. (Interestingly, while the gargoyles also made it into the larger version of the viaduct courtyard for Deathly Hallows, their features are much more sharply defined and less eroded in this version. I decided to split the difference for the purposes of my model.)
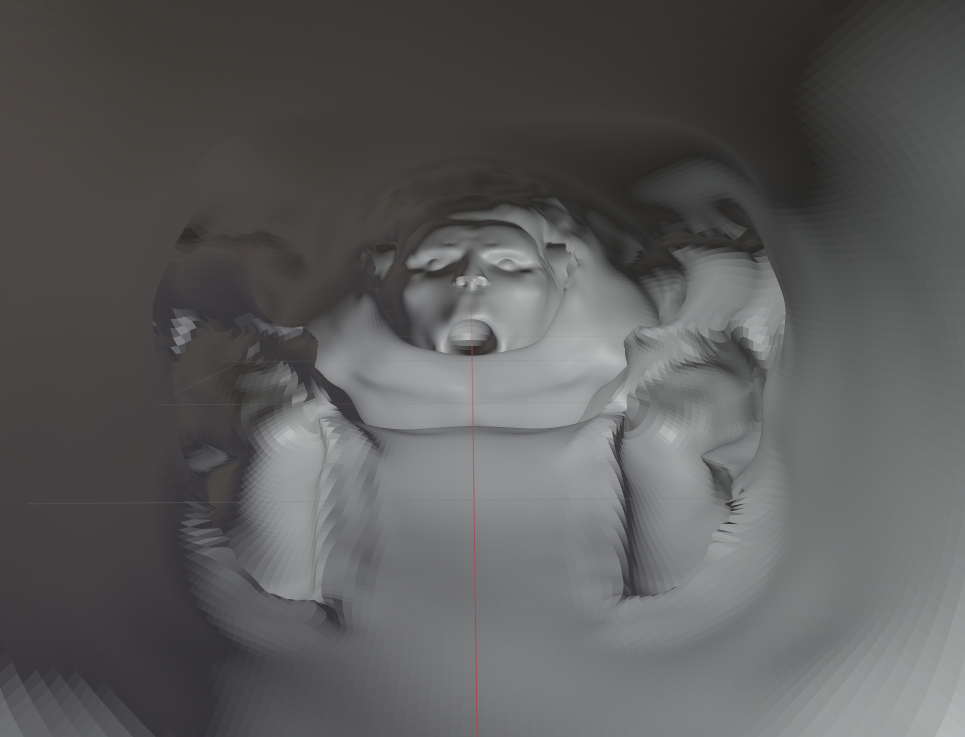
For the centaur design, I even had the benefit of a pretty accurate orthographic drawing published in The Art of Harry Potter. I based my Blender sculpt on that drawing and then baked a normal map onto a simplified version, much like I did for the fountain statues, although I didn’t bother with manual retopology – I knew this guy would never need to be rigged, posed, or animated, so I just let the Remesh modifier take care of the simplified topology for me. Anyway, you’ve already seen me go through this with the fountain statues, so instead of boring you with similar images, I’ll share this unique WIP view of the centaur sculpt from the inside:
Enjoy your nightmares.
Anyway, here’s the completed centaur design in situ, with some procedural noise layered onto the normal map baked from the sculpt:
I made the mistake of not putting much work into the base mesh before sculpting this guy, so there were some areas of the sculpt that got dicey. The hippogriff fared better because I took the time to create a proper base mesh, like I had with the eagle sculpt. See, what a cutie! (I didn’t have original ortho drawings for this one, so I was wingin’ it. Heh.)
I tried to again use the Remesh modifier for my lower-poly version, but it didn’t work as well on this fella. Sharp parts like the beak and claws did not work well at all. Back to manual retopology! Oh well, it’s good practice, and a good opportunity to improve upon some of the poor topology on the eagle statue. My brain is not wired to easily just throw down perfect edge loops.
By the way, if the term “normal map” doesn’t mean anything to you, here’s what the one for the hippogriff gargoyle looks like:
The different colors essentially tell the software to pretend the surfaces point in slightly different directions than they actually do, thereby simulating details that aren’t actually there. Blender “bakes” these maps by comparing the surface of the simplified mesh to the original sculpt.
Here’s the end result:
The tricky thing with this one is that the front legs seem to have fallen off many of the gargoyles in the clock tower courtyard and the original viaduct courtyard, but the ones in the larger Deathly Hallows viaduct courtyard are intact. I think I’m just gonna keep the legs for the time being.
Here’s where we’ll leave off for today. In a future post, we’ll build the remaining walls of the courtyard and damage the appropriate areas.
How do you interact with art when you learn things about the artist that are uncomfortable? How do you consume a product when you learn things about the producer that are disappointing? This isn’t the first time I’ve pondered these questions, and it won’t be the last.
Of course, I don’t think there are any easy answers on this; in order to reject the work of anyone who ever made a mistake or held a hurtful belief, we’d have to completely isolate ourselves – far more completely than anyone’s been doing even in the midst of this pandemic. On the other hand, there are some acts so disgusting that I can’t bring myself to enjoy anything else wrought by their perpetrators. I don’t have any interest in ever watching The Cosby Show again, for instance.
So where do you draw the line, and how do you do it? Is it even a hard line, or is it more of a gradient? I don’t have the answers.
But I do know that you have my support and respect in expressing your gender identity in whatever ways are authentic to you. As someone who’s spent quite a bit of time immersed in J. K. Rowling’s work (and other derivative works), I choose to honor its best themes and messages, not her disappointing views on trans identities.
More renders and project updates to come, but it wouldn’t feel right just ignoring this issue in this blog, of all places.
Okay, time to wrap up the fountain in the clock tower courtyard from Prisoner of Azkaban!
First up – finishing the statues. I believe the original Mexican symbology has the golden eagle perched on a prickly pear cactus, but the base of this statue appears to be a nondescript rock, and that’s what I’ve modeled it after. It was fun to glob that together with Blender’s “clay strips” sculpting brush; I also rigged and posed the eagle’s mouth and claws to hold the rattlesnake, whose body started as a squiggly Bezier curve with a circular cross-section. I enjoyed trying to match the sinuous, energetic gesture of the original.
The snake’s head was sculpted separately with its jaws already fully open…no need to worry about rigging and posing this fella. Good reference is scant for the head; as with the eagle, I relied on photos of real animals to help me fill in the gaps, but it was surprisingly hard to get a good “likeness.” Oh well…at least I planned out the retopology a little better than with the eagle. That enabled me to graft the head onto the body and bake a normal map from the head sculpt. He still looks kinda funky without fangs, but they appear to have been weathered away in the film.
With that, the only things remaining were integration with the main model and damage/erosion! Not too shabby-looking, right?
Integrating this into the main model ended up being very easy. There are four statues: one at each corner of the fountain. As I placed these, I spotted some angles and proportions that were a little off, but I suppose that’s the downside to working on the statue in its own file. Oh well. The complete fountain still looks pretty cool!
I suppose it’s a little misleading to describe the fountain as “complete” when it didn’t actually have…you know…a fountain…so let’s run some fluid simulation!
Not great, but it’ll do, especially because we won’t normally be this close.
The last step with this fountain was to destroy it a little. There are big chunks of it that have crumbled away. After creating some jagged meshes to cut these away with Boolean modifiers, I arrived (after over 2 weeks of on-and-off work) at the complete fountain!