In the early Potter films, scenes in Professor McGonagall’s Transfiguration classroom were shot on location in the chapter house at Durham Cathedral. As part of their efforts to make the original exterior miniature somewhat consistent with the location shoots, Stuart Craig and his team adapted the exterior of the chapter house as part of their design.
I say “adapted” because the details don’t really match. Still, it’s very clear that this structure just south of the middle courtyard (also adapted from Durham) was intended to be the exterior of the classroom.
Here’s the basic shape of the structure:
My “reference board” for this structure is one of my smallest. This is partly because it only existed for two films and partly because it’s not that big or complex a structure…but it’s also partly because reference is really, really scarce. Like…a couple of shots in Chamber of Secrets and a behind-the-scenes photo from Sorcerer’s Stone, plus the floor plan that sits beneath the model. Still, it’s enough to reconstruct what most of it looked like…
…except I have literally zero shots of the far side of the structure, the one facing the courtyard. I’d be in heaven if I could find a shot of the original miniature from an angle like this:
It would clear up my questions about the side of the Transfiguration classroom facing the courtyard, not to mention the original training grounds tower roof on the right. Again…maybe someday. In the meantime, I’m leaving the wall facing the courtyard blank.
Anyway, here’s the less mysterious side with all the nice details:
And, as promised last time, here’s a slider comparing the whole area in the first film (left) to the redesign in the third film (right), including the relocation of the suspension bridge:
For Sorcerer’s Stone only, the Quidditch training grounds were surrounded by curtain walls, retaining walls, and small towers that were slight adaptations of structures at Alnwick Castle. As we’ve seen in previous posts, a big chunk was redesigned in Chamber of Secrets, and then a big hill covered up the remainder of the original design starting in Prisoner of Azkaban. (The all-digital version in Deathly Hallows and Fantastic Beasts doesn’t have any walls back there at all.)
Because of all this, there’s not a huge amount of reference available for this area of the miniature. It’s certainly easy to find reference for the real thing at Alnwick, but what reference I do have makes it clear that the details don’t always match up. Just gotta do my very best!
I continued around to the far side, where the information is most limited. I’ll compensate for my less-than-complete confidence in certain details here by including the “mist pass” for this render, just for fun. This is a component of the render that’s used to add some atmospheric perspective. The further something is from the camera, the lighter it is, simulating greater amounts of haze between the viewer and the object. Looks kinda cool all by itself, eh?
There’s a low wall that divides the Alnwick Castle lawns in real life, and it shows up in the blueprints for the first Hogwarts miniature as well. The real thing even shows up in a single (edited) establishing shot of the location, at the beginning of the flying lesson. But I’ve never found a single photo of that spot in the miniature, which makes it tough to know exactly how much detail they put into it.
I’m cheating with all these lawns – they’re just textured surfaces with no actual blades of grass. To create those would require particle systems or geometry nodes or something, and I don’t think my computer could handle the amount of grass that’ll eventually be part of the model. Even filling just this area with actual blades of grass would be pushing my luck:
So I’m not really sure how I’m going to handle the landscape as a whole. The goal is to have it look…well, not like this render I created as a kid in Bryce 3D, circa 1999:
I can tell already that I won’t be able to rely solely on procedural materials. At the very least, I may need to hand-paint some changes in coloration near the footpaths and whatnot. Perhaps another day. In the meantime, we’ll close out for now with an extremely wide (and slightly distorted) angle reminiscent of the first shot of the training grounds in the first film.
Still not sure how I want to handle the statues on top of the Alnwick Castle structures, so I’m hopping back over to the training grounds tower.
Part of this little corner still needed to be filled in. It’s hard to find good reference for that spot on the miniature, and it does seem to be somewhat different from the real thing at Alnwick. I decided to just do my best (and add the footpath where Hagrid drags the Christmas tree through the snow):
There are a few torches that show up over here in some shots in Chamber of Secrets, but I’ve elected not to include those – their positions aren’t always clear or even consistent from shot to shot, and I’m not sure whether they were ever in the main miniature.
Around the other side of the structure, I’ve accepted the difficult truth that I may never find adequate reference for certain details. I’m using the real structures at Alnwick to fill in the gaps as best I can. Fortunately, some of those real-world details are visible in the background in Sorcerer’s Stone, so I feel justified in including them.
This shorter structure on the right corresponds to Alnwick Castle’s 19th-century chapel, and from what I can see, it seems to have been a pretty exact recreation in the miniature:
Incidentally, see that rectangular depression a ways to the left of the chapel, above the arched recessed windows? In real life, the heraldic symbols of the Percy family are there. In the Hogwarts miniature…I can’t tell. It’s too tall to just be a Hogwarts crest. So I’m just leaving that blank for now. If you’ve got closer images of the miniature here…please send them! I’m always on the hunt for new rare photos or blueprints of the miniature.
In the meantime…here’s the complete training grounds tower, as it existed from Chamber of Secrets through Order of the Phoenix!
Fun fact: In the last render above, we’re sitting on the clock tower courtyard roof. The foreground cylindrical tower on the far right is of course Gryffindor Tower.
You might notice that I’ve removed the Alnwick Castle barbican/gatehouse and adjacent walls. Or rather, I’ve moved them so they don’t exist in my Prisoner of Azkaban model anymore, since that area will be covered up by hills. Don’t worry – those structures still exist in my nascent Sorcerer’s Stone model, and they’ll become part of my Chamber of Secrets model too.
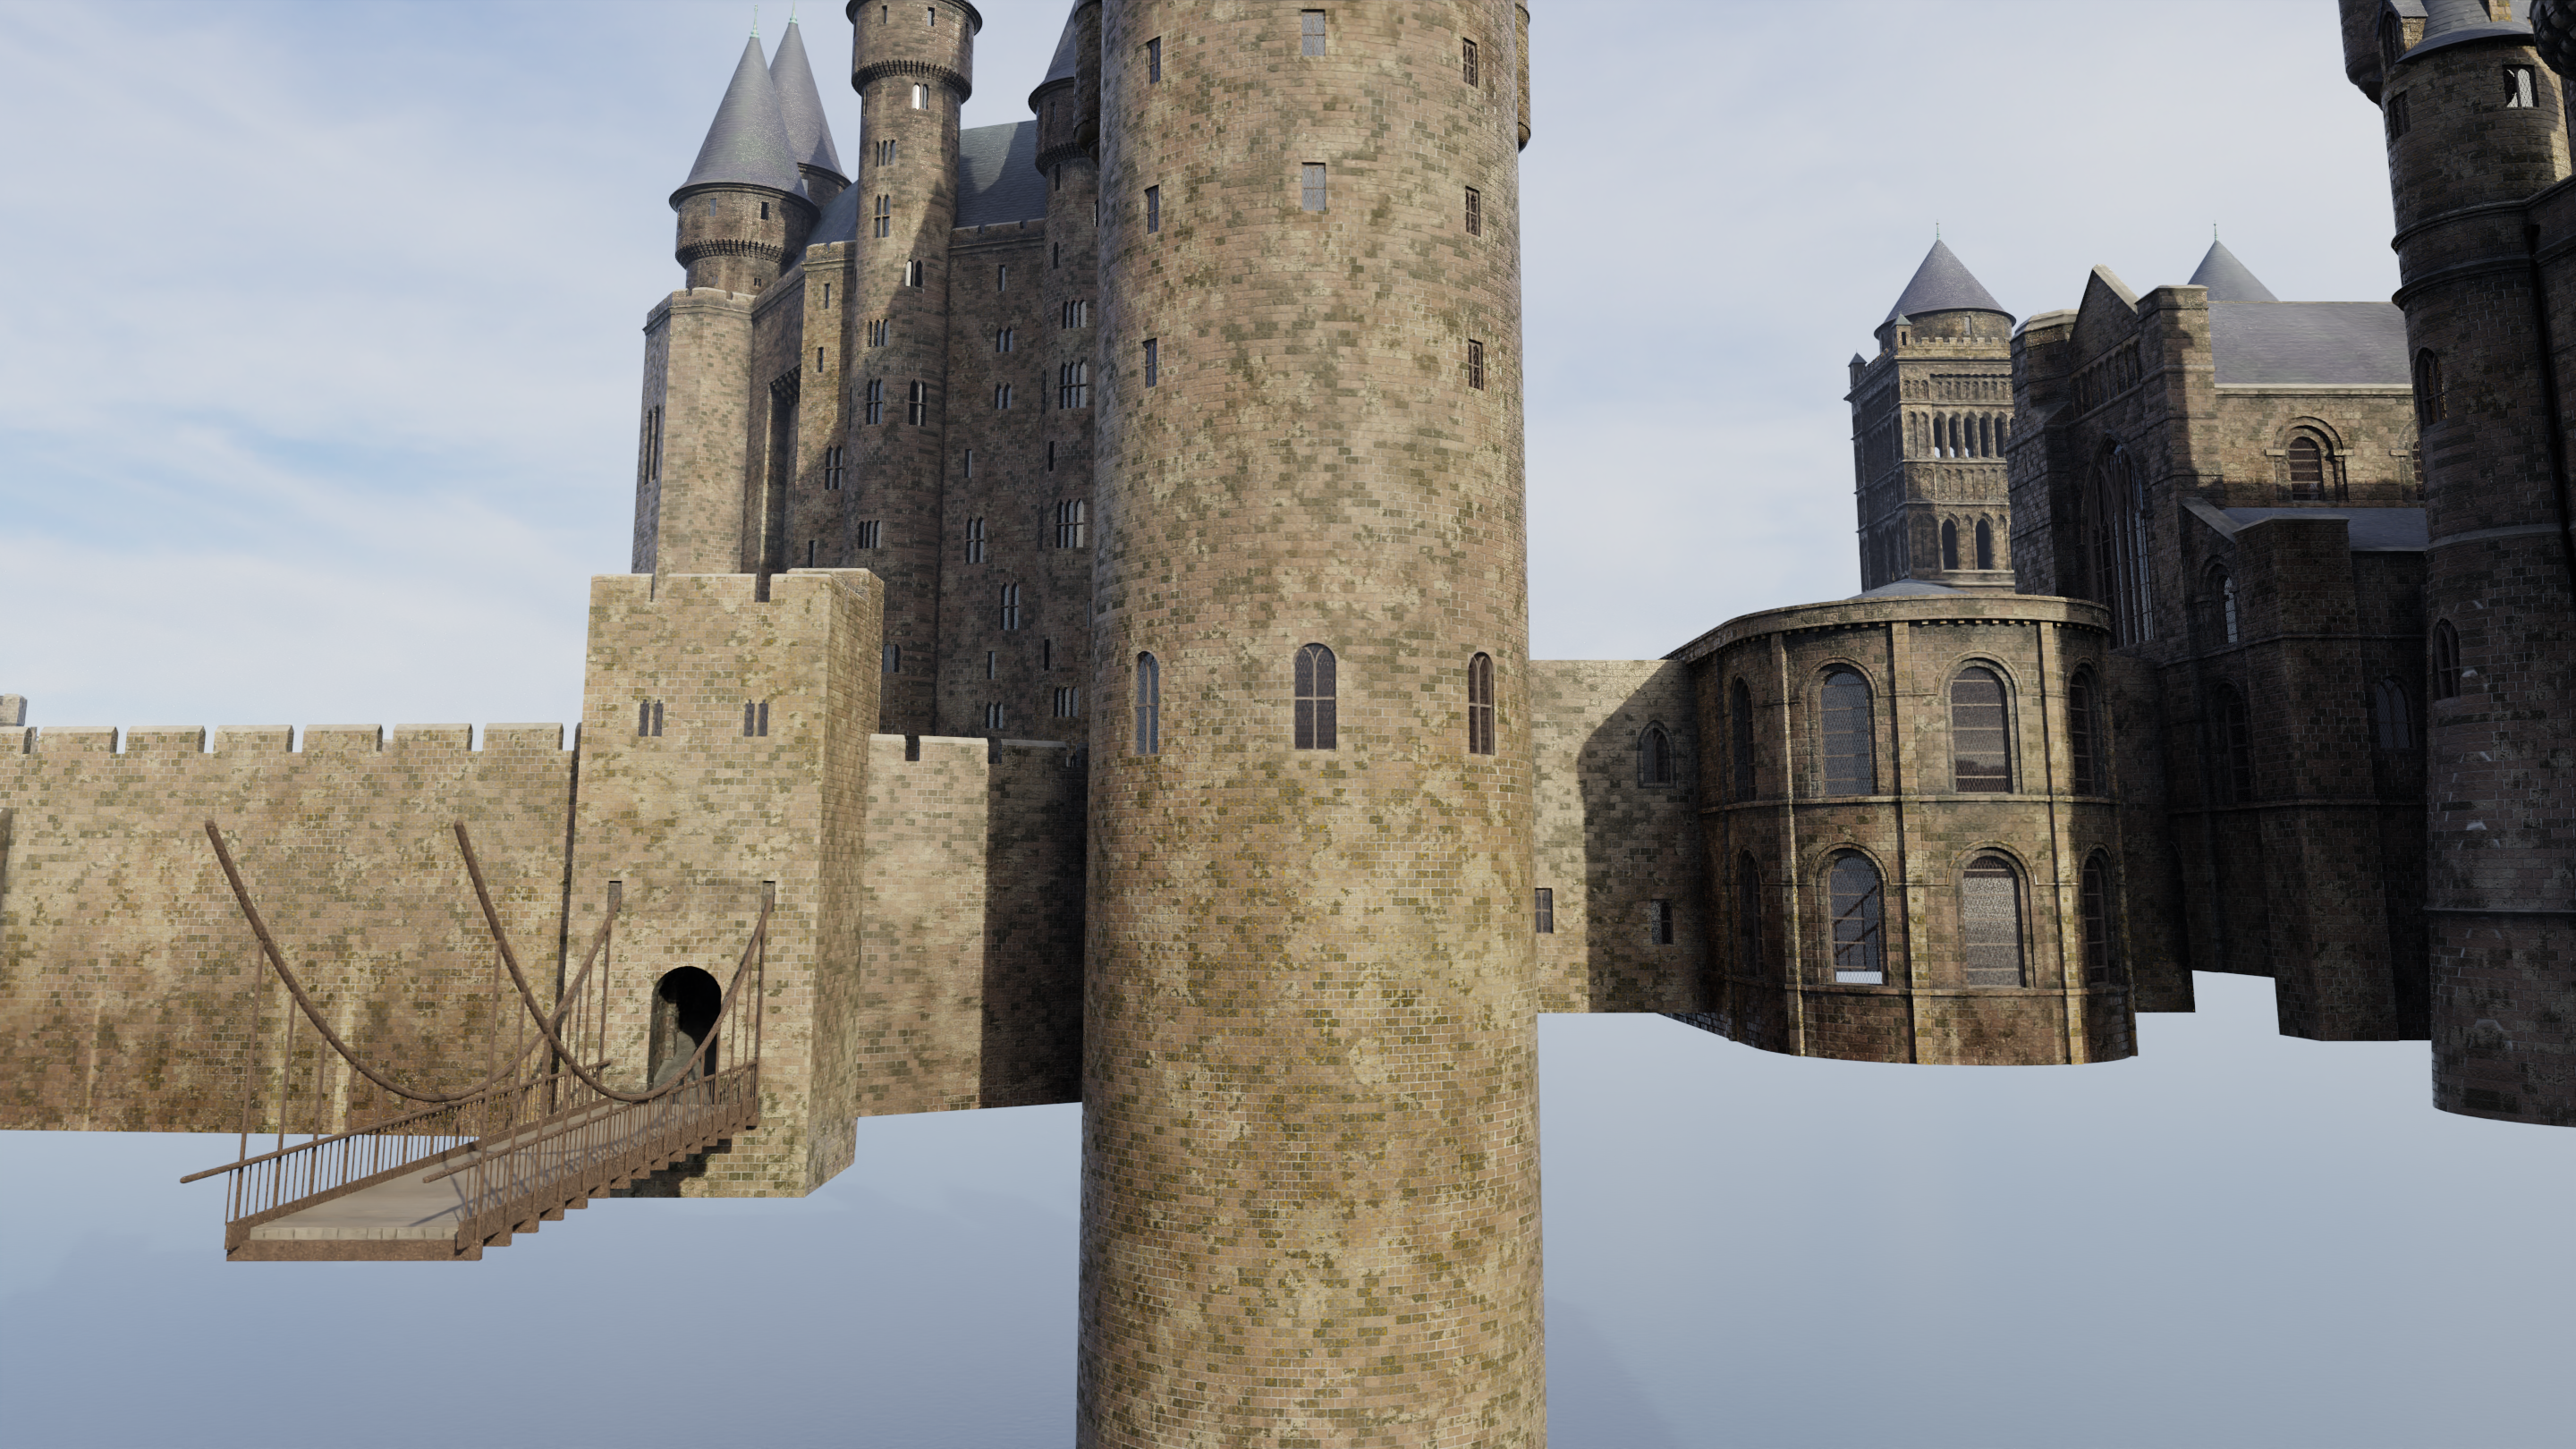
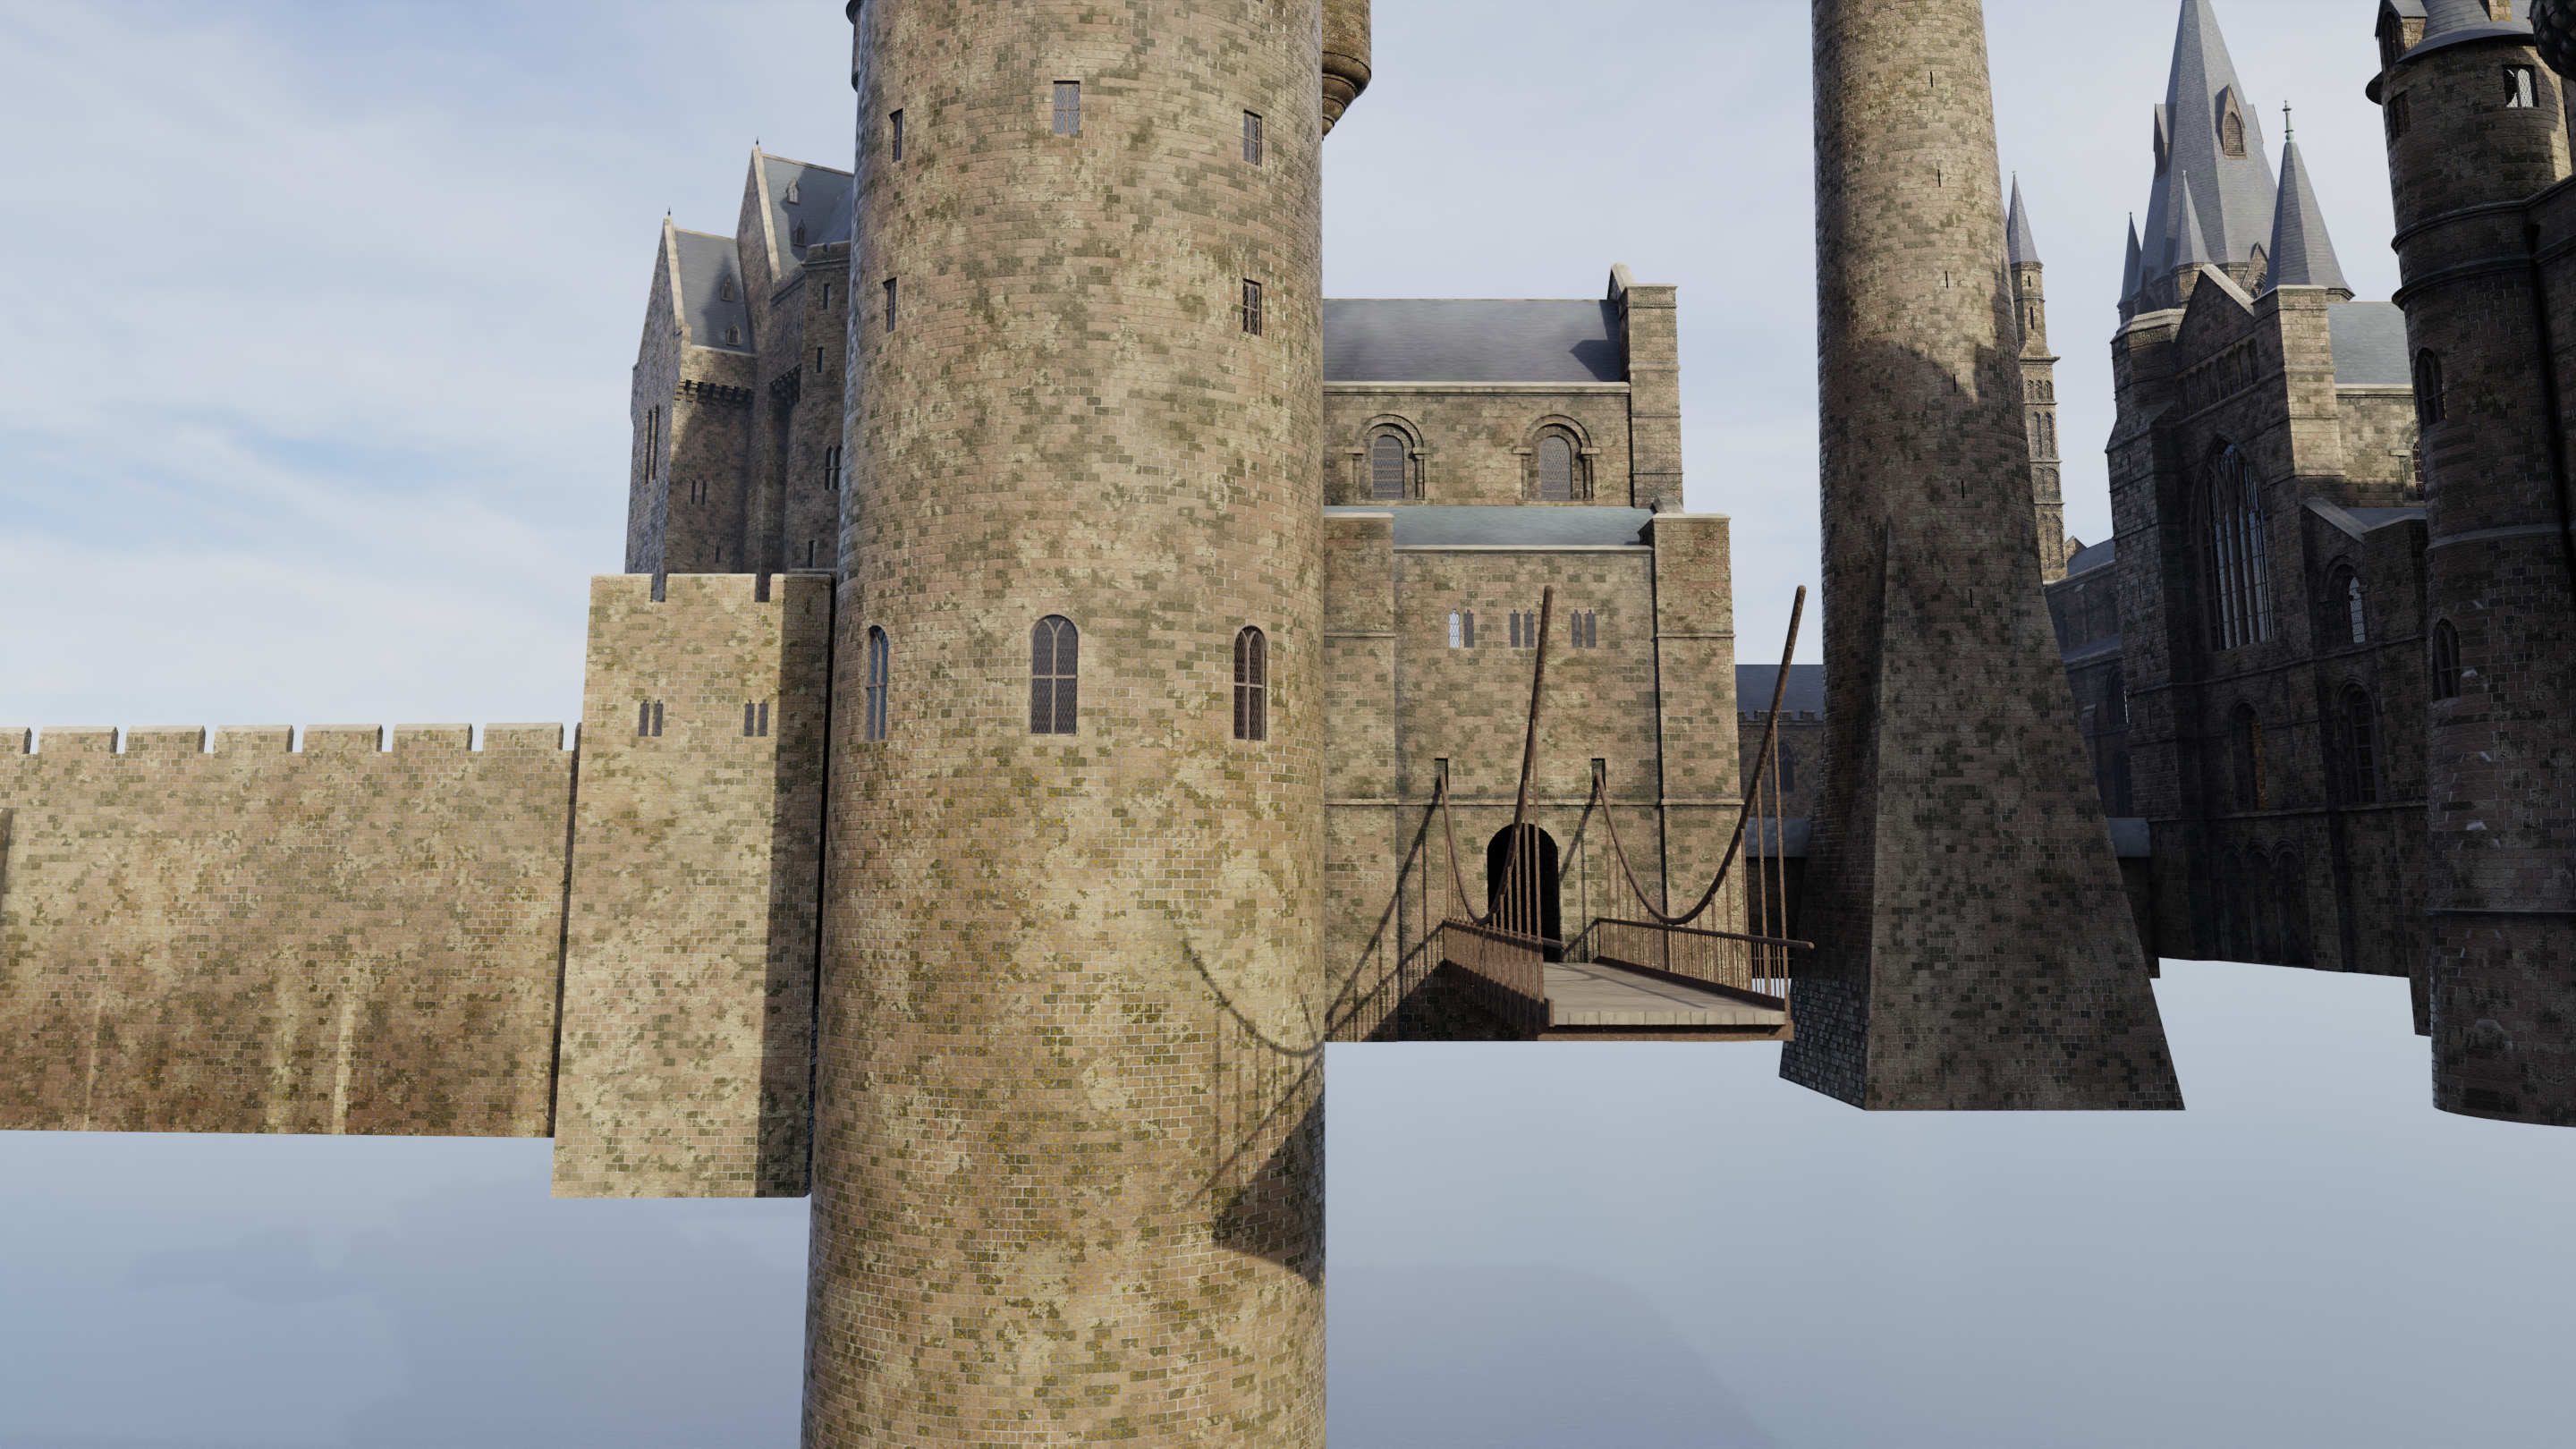
Holy crap! I can’t believe we’ve arrived at the final major tower of Hogwarts! I’ve been eager and afraid to tackle it because of its complex geometry and the limited reference available. Let’s jump in!
The training grounds tower was added to the original castle out of sheer necessity. Alnwick Castle was used as a major filming location so they needed it to be present in the miniature. Stuart Craig’s team tweaked its footprint a bit and built it up into a much taller complex of towers; the bottom floors just looked like Alnwick while the upper floors took their stylistic cues from the original castle’s other conical turrets. Evidently Mr. Craig didn’t like the vertical extensions, because they were totally redone for the second film in a style that slightly foreshadowed the more Gothic look that would take over in the third film. (Interestingly, some COS shots still feature the SS version.) That revision stuck around till Half-Blood Prince, when it was replaced with a single tower echoing the bell towers’ design.
Since I’m working on the Azkaban castle right now, it’s that second iteration of the tower that I’m focusing on. And “focus” is indeed the right word, because I’ve spent a lot of time just staring at reference images and…thinking. Trying to piece it all together. Eventually, I started working on the facade toward the right:
This is the project’s first render with the OptiX denoiser, which wasn’t compatible with my GPU till Blender 2.90. Denoising is critical with path tracers like the Cycles render engine, where speeding up the render introduces more noise. I was using Open Image Denoise before, but OptiX is faster and it’s retaining more detail, so I’m pretty stoked!
Anyway, training grounds tower. It’s proving as challenging as I feared/hoped it would be. The modeling itself is not particularly difficult, but the paucity of high-quality reference images makes it difficult to piece together all the details, especially since I want to get the scale right.
I’m keeping an eye on the original version too, since the lower section is identical and I want to make sure I can reuse it without any issues.
In a twist that will shock precisely zero longtime readers, I’m finding lots of small discrepancies between shots of miniatures, location shoots at Alnwick Castle, CG long shots, etc. As usual, I’m striving for something of a happy medium, but weighted toward the main 1/24th-scale miniature.
There’s still a lot more to do on this structure, but it’s been 10 days since I last shared my progress and I think I’ll save further progress for my next post.
It’s not a question that you could answer just by watching the films. Here we have to rely on behind-the-scenes shots and technical drawings from Sorcerer’s/Philosopher’s Stone to reconstruct this area in its original state.
But first, I knew I needed to finish up this area as seen from Chamber of Secrets through Half-Blood Prince! I finished the curtain walls and added lawns:
Here’s a cool POV shot coming down the back steps of the Durham building:
That’s a wrap for this area in the Prisoner of Azkaban 3D model! But what did it look like at the time of the first film? Well, you still had curtain walls surrounding a large, L-shaped lawn, but the walls weren’t quite as far from the castle, and instead of the domed conservatory acting as the entryway, you had this relatively simple, squarish, Alnwick Castle-inspired building:
This side of the building is actually seen in a couple of shots in the film, but I haven’t been able to find as much detailed information about the other sides – in particular, the opposite side that faces the castle proper. For that facade, I’ve just used the same details as what you see here, but I can’t deny the possibility that some of the details were a little different. (I wonder in particular if they really would have put the Hogwarts crest on the other side.) Unless I find elevations or images of that part of the miniature, I may never know…when the greenhouses and conservatory were added in COS, this small gatehouse disappeared forever.
Anyway, here are a couple of before-and-after sliders to play with! On the left is the Sorcerer’s Stone castle; the right is Prisoner of Azkaban. (The changes we’re currently focused on occurred in Chamber of Secrets, but you’ll of course see some Azkaban changes too.)
I’ll wrap up this post with a view of some additional work I did next on the west side of the Alnwick Castle warder’s tower. Here there are again some details that differ a bit between the VFX miniature and the real-world filming location; I’m primarily going off of the miniature, though Alnwick does provide invaluable reference as well. I guess you could say my goal is to capture the shared imagined reality that the model and the location both help bring to life.
The two contenders for my next area of focus are the transfiguration/middle/Durham courtyard and the training grounds tower. I’m much more excited at the prospect of doing the latter, but I think I may tackle the courtyard first. Be sure to subscribe to be notified with future updates!
I’ve been looking forward to this one! When the greenhouses went in for Chamber of Secrets, the small building forming the entrance to that courtyard was replaced with a larger and more ornate conservatory with a dome and cupola. It’s a neat structure, but my biggest reason for being excited is that there are blueprints at the Warner Bros. Studio Tour…and these provide lots of detail on the interior, which is hard to glimpse from the exterior of the model. The upshot is that today’s post concludes with the first (to my knowledge) views of the conservatory interior on the internet!
How’d I get there? Well, I decided to start from the inside; it’s easier that way, plus it allows interesting views that won’t be possible once the structure is enclosed. There’s an octagonal arrangement of planters and columns:
Texturing the interior is an interesting challenge. I don’t want to spend that long on it, since it’ll barely be visible from the outside. It’s also hard to find good texture reference precisely because it’s barely visible from the outside – and for the same reason, they probably didn’t go super realistic in terms of all the finishes anyway. (From what little we can see at the Studio Tour, it looks like the inside may have become understandably dusty, which further complicates things. I also don’t know what they were going for with the weird gold paint job on the planters.)
As I pondered this, I continued with the modeling. Next up was the spiral staircase up to the balcony level. An apparent inconsistency in the technical drawings gave me a moment of trouble with the number of risers, but I’m pretty sure my interpretation is the correct one. With a little sleuthing, I learned that this spiral staircase was based on a 1:25 scale set sold by E.M.A. Model Supplies in London. In fact, the specific product (ST-7304) is listed for sale on their website to this day. Here’s the product image:
They then added the cage and banister. Here’s my version with most of the staircase modeling done:
Finishing the staircase and moving on to the balcony above:
Unless you’re pretty short, you’ll want to watch your head as you ascend the spiral staircase. There’s a spot near the top with less than five feet of vertical clearance.
It looks like the foliage in the conservatory is mostly palm trees and the like; I tweaked some assets from CGTrader. These obviously won’t be an exact match to the ones inside the miniature, but they get the job done.
Time to start enclosing the thing:
The next section up has more dragons. I’d planned on simply using the exact same asset from the greenhouses…but I should have done my research first. Turns out the ones on the conservatory are a little different in shape/size. So I went back and roughly rigged the dragon so I could pose it a little differently for the conservatory. It’s not a perfect match to the pose, sadly, but it wouldn’t be worth it to do a whole ‘nother sculpt.
Then it was just a matter of adding the dome…
The only thing left was the cupola on top. But as I was about to start that, I randomly started noticing some issues with the castle’s overall coloration. The color has always been a tricky thing due to the various changes in the paint job, the lighting, and the color grading over time. But I’ve gradually found more and more unprocessed shots of the castle in relatively neutral white lighting, and comparing those to my renders, I decided my castle needed to be a little more yellow and a little less red. It’s surprisingly tough to get the right balance, so I’ll likely go back and continue to tweak the colors at some point. But for now, I think this brings us still closer to a convincing reproduction of the castle:
Anyway, let’s finish the conservatory!
Not half bad! But of course, the real fun is putting the camera inside, where – again, to my knowledge – no Potter fan has gone before! It’s a relatively tight interior space, so we’ll use a fisheye lens:
And here’s a shot from the balcony level:
You saw it here first, folks! (And if you didn’t…well, let me know where you did see it first, because I’d love to see more views inside the conservatory!)
I think my next steps will be to finish the last bit of the curtain wall surrounding the greenhouses and then finish up all the footpaths and lawns. See you soon!
The 3D model of the Prisoner of Azkaban castle keeps chugging along! After completing that first greenhouse, I duplicated it three more times:
These four all share the exact same design, but then there are four more along the east side of the Durham area, and their dimensions are a little different, so I had to create (and thrice duplicate) a new variation over there:
And then at last there is Greenhouse Three, which is a smaller lean-to on the castle’s outer wall. (You can catch a glimpse of it in the above render.) This is the greenhouse where the Herbology lesson with the mandrakes takes place. It’s got its own unique design, so I took care of that next. Some of the dimensions here don’t line up quite as precisely as I’d like, but I’ve tried to minimize the number (and visibility) of compromises as much as I can:
You can also see that I’ve also added rust, adjusted the weathering of the wood, and started with the footpaths between the greenhouses. I even threw in one of the largest vines that snakes its way out of the greenhouses, visible toward the bottom right:
In the background, you’ll see that I’ve begun the curtain walls around the greenhouse area. These were actually there in the original design of the castle, even before the greenhouses were added in Chamber of Secrets; they just had to be pushed outward a bit to accommodate that addition. Here’s a better view of their progress:
See where the wall stops on the right? That’s going to be the site of the final greenhouse structure, the domed conservatory that also acts as the only way out of the greenhouse courtyard and into the grounds. But I’m going to save that for the next post. I’m hoping to even share something I’ve never seen before: an interior view of that conservatory*!
In the meantime, I’ll leave you with a slightly different aerial view of the POA model so far. Still plenty more to be done, but we’re getting closer!
* If they happened to include the conservatory interior in any of the video games, let me know! I haven’t played them but I’ve looked through longplays on YouTube and never spotted it.
I promise we’re going to get to sculpting the decorative dragons from the tops of the greenhouses, but first I wanted to share a “before and after”. A reader who goes by kronkolweg pointed out that my castle’s bricks were a little big. It had already been starting to bug me a bit, and this was just the kick I needed to get off my butt and fix it.
For the original castle miniature, one or more brick textures were hand-sculpted, molded, mass-produced in FastCast resin, and glued to the miniature’s wooden understructure before being hand-painted. There was a transition to more detailed plaster-based textures starting in Chamber of Secrets – I’m not sure if any of the original resin brick textures ultimately survived through to the final Half-Blood Prince iteration of the miniature. In any case, the overall effect is the same, and my procedural brick material mimics it without requiring me to individually texture each wall. The thing is, when I created this material (as documented here, here, and here), I had much less of the castle built, which meant I had fewer points of comparison for the scale of the bricks. Frankly, I don’t remember how much actual measurement there was, as opposed to simple eyeballing, but it’s become clear that the results are a little oversized.
So, being the Excel nut that I am, I sat down and made a spreadsheet. I took horizontal and vertical brick counts for various areas of the castle, comparing my model to the miniature. There’s a certain margin of error in the scale of my castle, and the bricks of the miniature are not necessarily of completely uniform scale, so I averaged the different measurements and arrived at my brick adjustments: a 34% reduction in width and a 21% reduction in height.
The interactive sliders below compare the old larger bricks (left) to the new smaller bricks (right):
The difference is subtle from any real distance, but it’s more accurate now, which always feels good.
With this tweak completed, I shifted my attention to those greenhouse dragons! Fortunately, they’re all identical, so I only had to sculpt one. I did so in a separate file, and – well, if you’re interested, just watch part 1 of the video.
Frankly, I can’t get enough of these sliders, so let’s compare the base mesh to the full-resolution sculpt…
…and now comparing the full-resolution sculpt to the retopologized version with normal mapped details:
If the differences seem really minor…good! The point of retopo is to vastly simplify the geometry, which makes the asset a lot more manageable. The sculpt on the left has over 1.3 million faces; the retopologized version on the right only has around 1,500. Much easier on the computer! Of course, that eliminates a lot of details; baking and applying a normal map is a way of faking those back in, hopefully with an end result that’s nearly indistinguishable from the original sculpt. (In this particular case, there are a few small artifacts in the shading, but these are not noticeable when color is applied and we move the camera away a little.)
You can watch this whole process in part 2 of the video:
The retopology process is still a lot slower, harder, and more frustrating for me than I’d like, but in the end I was satisfied with the result, so I created an appropriate material, brought the mesh over into the main castle model, and duplicated it to the appropriate spots on the single greenhouse I’d already created. Voilà!
That’s a wrap for the dragon, and for this greenhouse overall! The next steps will be to duplicate this greenhouse and create the other two design variations on it. Then I’ll be able to move on to the domed conservatory, the curtain walls surrounding the greenhouses, and hopefully some ground cover and footpaths. Be sure to subscribe to this blog and the YouTube channel for updates as they come!
Hogwarts got its greenhouses added in Chamber of Secrets. They sat undisturbed in what was formerly an open courtyard until Deathly Hallows Part 2, at which point some adjacent architecture was removed and the greenhouses expanded a bit to fill the empty space.
My own 3D recreations of these greenhouses provided some fun challenges right off the bat. As I alluded to in the previous post, I was surprised to realize that they are not all identical. I mean, I knew that there was a lean-to attached to the wall of the castle as well as a domed conservatory out front, but I’d assumed the other greenhouses were octuplets. No such luck. The ones that run parallel to the Long Gallery aren’t quite as long as the ones that run east-west along the north facade, though they’re made of the same basic building blocks.
As always, I wanted to get the details and dimensions right. Without much in the way of detailed technical drawings, I resorted to making some quick-‘n’-messy diagrams to organize my thoughts and measurements.
Quick and messy, like I said, but it really helped me figure out how to proceed with the modeling. I started framing just one wall of just one greenhouse, laying out the largest support posts every 10 feet. Some of these will eventually have sculpted dragons on top, but those’ll come in a future blog post:
Blender’s Array modifier makes it easy to just work on one segment and have all the others update accordingly. No textures at this point either – I knew the white paint would later need to be scuffed up a bit.
Adding more details, temporarily pretending that the greenhouses don’t have any doors:
The familiar question of whether to follow the miniature or the set cropped up yet again. Actually, it’s more complicated. The greenhouses didn’t show up often in the films, but they got a glorious establishing shot in Chamber of Secrets. The VFX team put together a very impressive shot that moves across the lake, over the grounds, and right through an open window into the lean-to, AKA Greenhouse Three. The shot combines the 1/24th-scale Hogwarts miniature (and CG background) with a live-action plate shot on the greenhouse set, and it’s pretty seamless, especially for the early 2000s. But the camera has to go right up to the greenhouses, exposing a lot of detail…and at 1/24th scale, some of that detail wasn’t going to hold up. So they built separate 1/8th-scale miniatures of the three greenhouses the camera would get closest to. For whatever reason, while those larger bespoke miniatures match the design of the set, the main castle miniature is slightly different. I’m mainly talking about the windowpanes – they’re narrower and more numerous in the main castle miniature.
Sooooo…what to do? Follow the set and 1/8th-scale miniature, or follow the 1/24th-scale miniature? I take these decisions on a case-by-case basis, and for the greenhouses, I ultimately went with the wider windowpanes from the set and 1/8th-scale miniature (for a variety of reasons).
Here we go – doors and details and preliminary materials.
Starting to add the beams for the roof:
Hey, it looks kinda like a greenhouse!
By this point, I had been really debating exactly how much interior detail to do. This project file just keeps getting bigger and bigger, which means my computer has an increasingly hard time keeping up. It’s thus in my best interest to only include the details I need – but of course, the greenhouses are rather transparent, and I still wanted to them to “read” correctly from the outside. Once I had them fully enclosed, I was able to see how the materials interacted with the light and decide how much interior detail I needed to include. Not much, it turns out, as long as I don’t let the glass get too crystal-clear:
Some of the geometry got slightly messy as I went around the corners of the greenhouse, trying to respect all the various reference images as much as possible, but I’m pretty happy with the result:
For a moment, I thought all I had left to do was sculpt the decorative dragons on top, but then I remembered that I needed to pop the roof hatches too – otherwise, how would the camera float in for that great shot in COS?
(These are all open at random angles, BTW…I’m anal, but not anal enough to match them exactly.)
Anyway, I’ll be sculpting the dragons next, but we’ll save that for a future post, hopefully in video form. I’ll also need to create all the other greenhouses using the same components. See you next time!
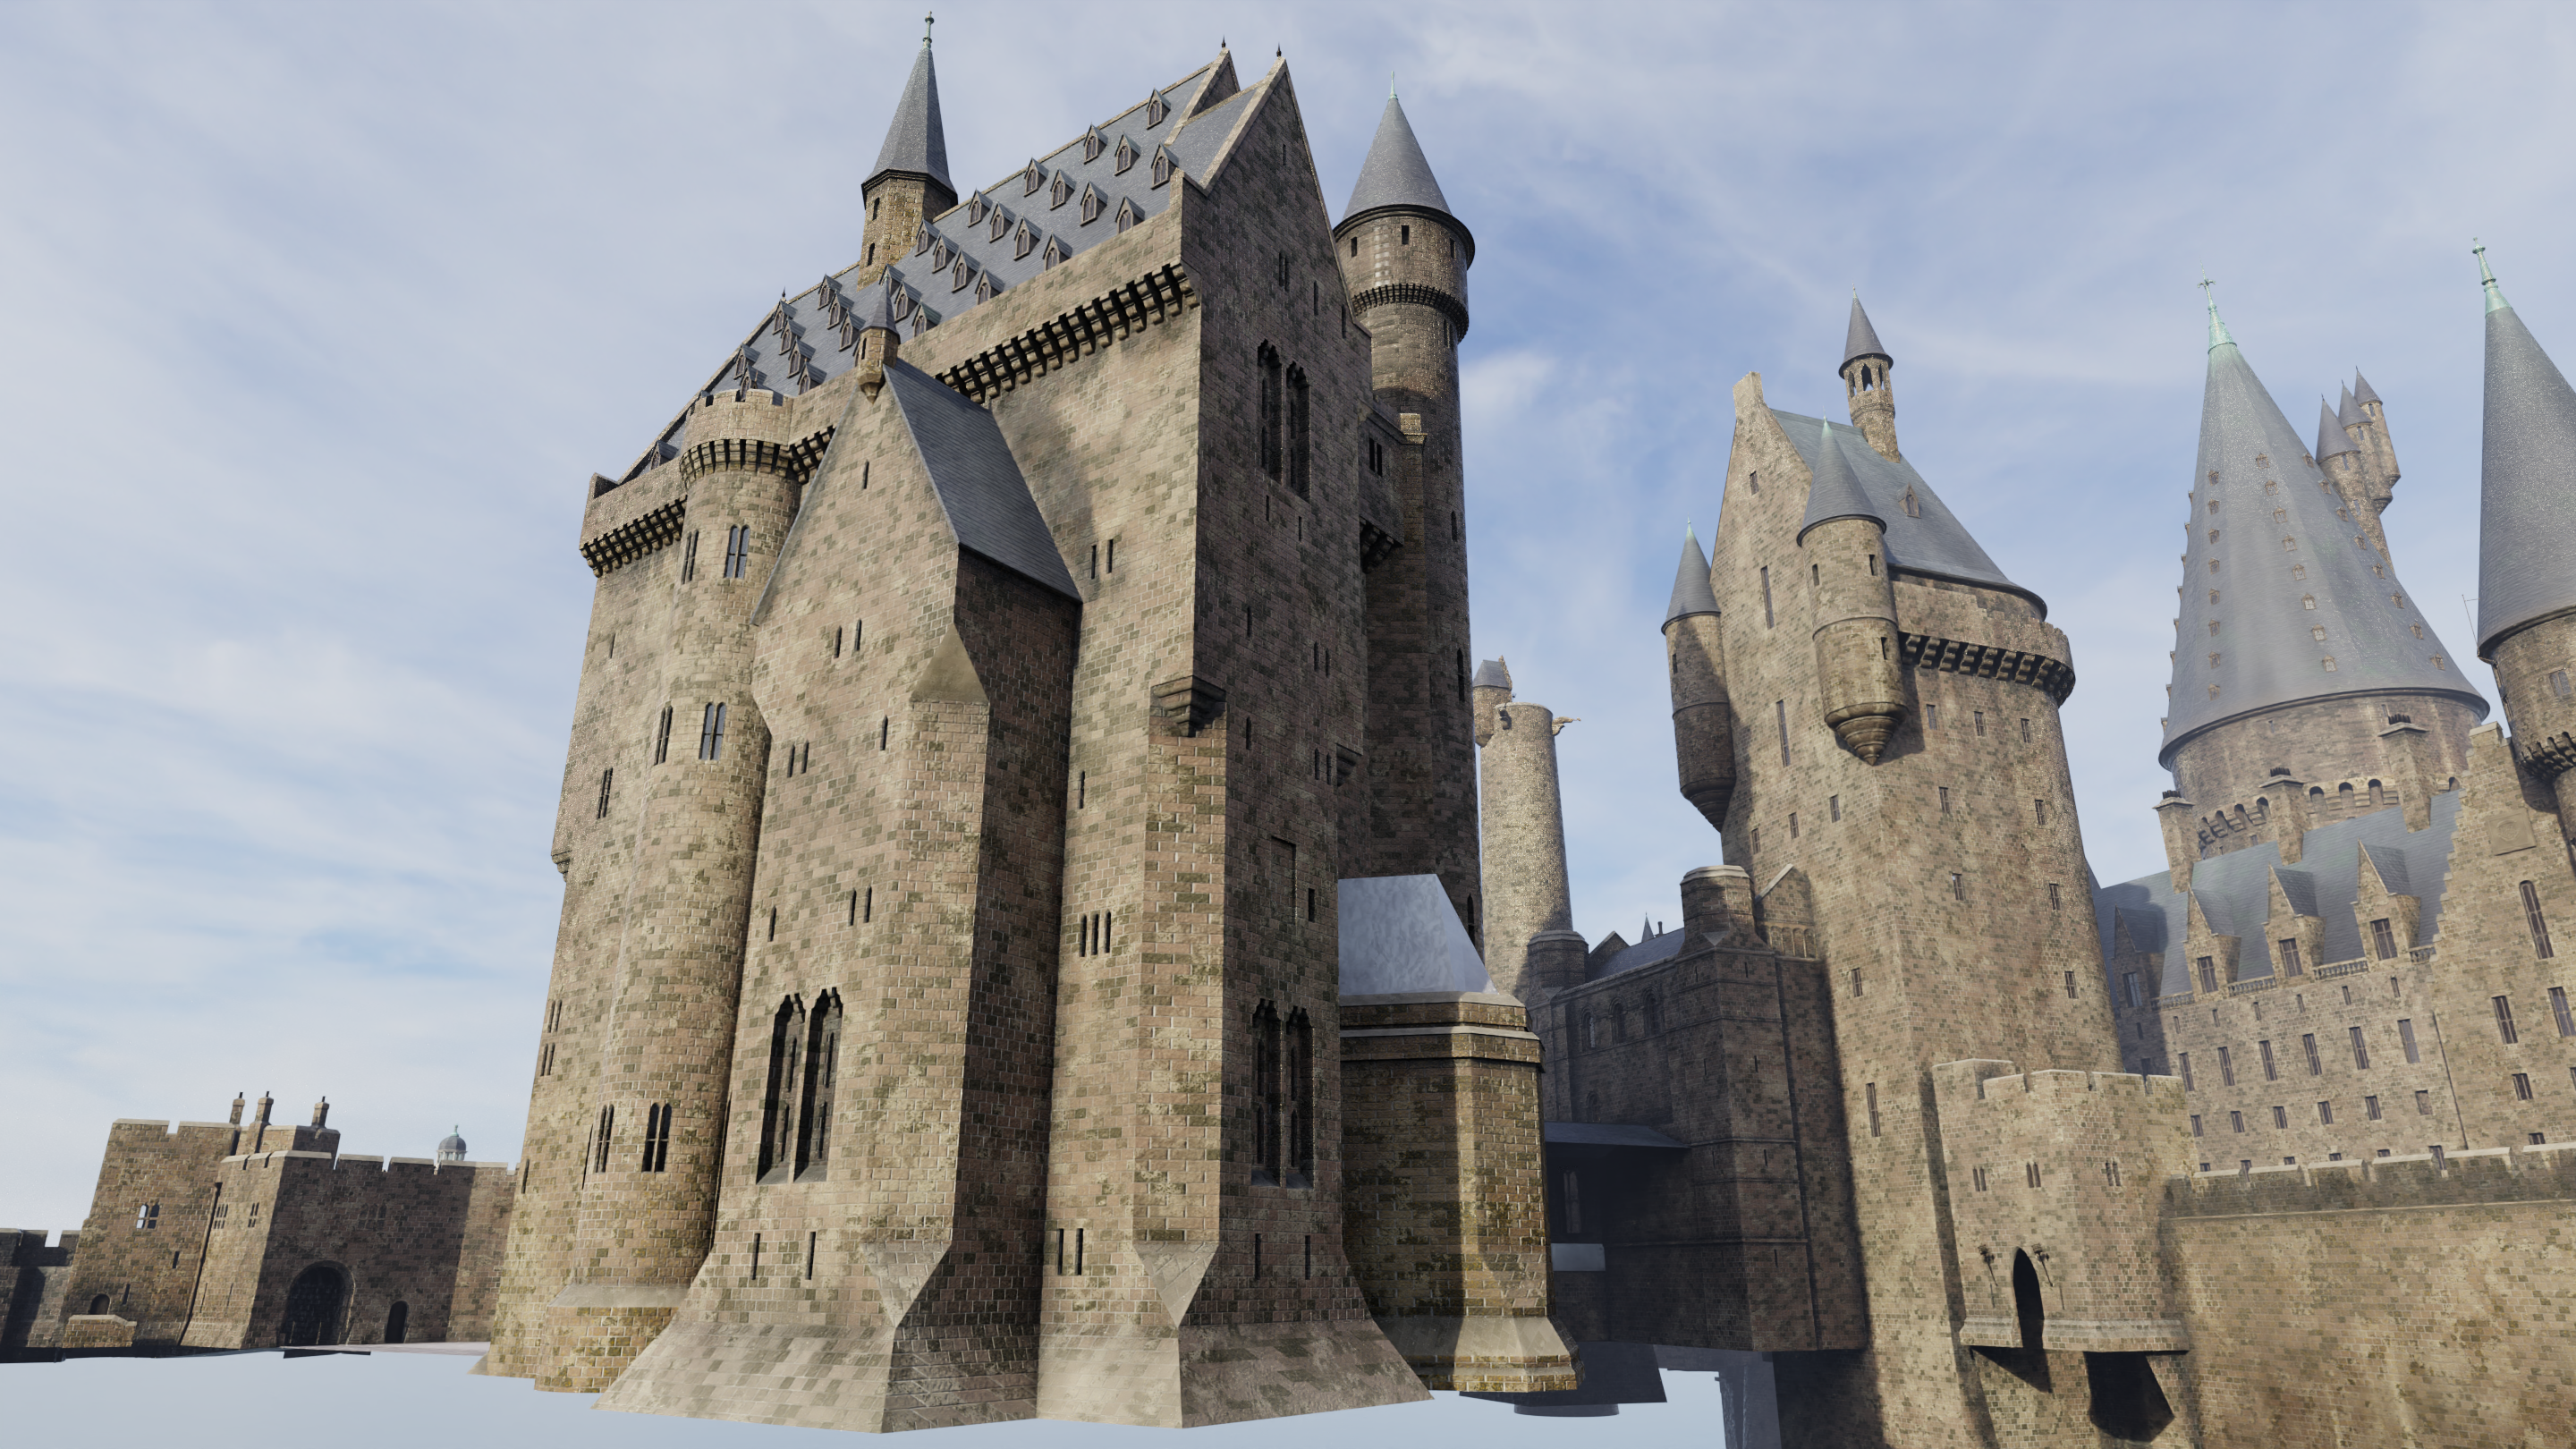
Here we go – those bell towers need to be completed. I finished the intricate openings and decorative motifs in the middle parts of the towers. Fortunately, these never changed in any of the films, even when the tops of the towers changed, so I only had to create them this once!
Then, to complete the bell towers, I added the tops of the towers, which are very similar to the top of the central tower – just shrunk by about 23%, and with a few minor design differences. I was grateful for this not only because it allowed me to reuse elements from the central tower, but also because I discovered a mistake in the central tower in the process. All fixed now!
Of course, there are two versions of the bell towers: the original design, and this Prisoner of Azkaban redesign. With the latter complete, I decided to switch over and do the former as well!
Sadly, photogrammetry is no help when it comes to the original tops of the bell towers, but their simple design is pretty easy to eyeball. A few of the smallest details were educated guesses – for instance, I’ve added windowpanes in a few areas that could just be openings.
Anyway, enough talk – let’s compare the two designs! Drag the slider below to compare the original Sorcerer’s Stone design (left) to the Prisoner of Azkaban redesign (right). (The smaller tower above the Long Gallery will also come and go, since that was added in Chamber of Secrets.)
Here’s a reverse angle:
Surprise – there’s the original design of the central tower, too! I snuck that in there as well.
Viewing the whole castle from lake level, you can really see what a difference this simple redesign of these three towers made in the castle’s overall silhouette and character. My model is also looking a lot more complete overall!
Adding the wall between the bell towers was easy, since all of its elements are similar to stuff I’ve already created. I briefly considered tackling the greenhouses next, but then I got distracted by the adjacent walls that bring us to the training grounds tower and the middle courtyard, which will probably be where I go in our next blog post.
In the meantime, Ms. Rowling continues to tweet disappointingly misguided things about transgender people. For what it’s worth – if you, dear reader, happen to be trans, non-binary, or a member of any other oft-marginalized community, know that this Hogwarts (incomplete though it may be) will always be there to welcome your awesome self, and so will I.