Sculpting, sculpting, sculpting…slowly, with many hours of rest to avoid aggravating my stupid arms…
Wrapping up the sculpting on this chunk of landscape:
Here’s an overhead view of the terrain so far. Play with the slider to compare the render (left) to a quasi-topological map (right):
The terrain just doesn’t look right, though, does it? I’ve been having a really hard time getting the colors of the rocks and foliage right. If I match one reference photo, it stops matching another…if I match one film, it stops matching another….if I match one lighting scheme, it stops matching another…if I match the rocks, it stops matching the foliage. Pretty tricky.
With more tweaks in this next render, we’re getting closer…
Then I paid a visit to textures.com and grabbed some rock photos. I scrambled those up together and used them to add a little photographic grit to my existing procedural rock texture.
We’re getting there! I’ll keep working on that texture. I also need to add some moss to the castle walls where they meet the rock.
Ending today with an unrelated render – I added a few more details inside the boathouse.
I reeeaaaally haven’t built this interior to hold up to this sort of scrutiny, so enjoy the rare close-up!
Well…the 2-3 weeks of computer rest didn’t do much good, sadly. We’re continuing to pursue other treatment options. In the meantime, I’ve been easing back into a bit of computer use, and I thought I’d share some of my (slow) progress with the terrain beneath the Sorcerer’s Stone castle.
Here I’ve resumed adding the next layer of detail to the area under the Great Hall:
I admit detailing everything manually was getting tiresome, so I finally started making use of this fabulous rock sculpting brush set from Blend Swap. I figure if the original modelmakers could use a mold of a big slab of coal, there’s nothing wrong with me using some photoscanned rocks for additional texture. This can be a good way to expedite the process of adding the countless tiny crags and crevices to the major forms I’ve sculpted. Then I can go back in and sculpt more details myself where necessary.
Blender’s “geometry nodes” system is getting better and better, so I started setting up a node tree that would add greenery to the top faces of the rocks:
Still needs work, but we’re headed in the right direction. I’ll round out today’s post with another angle and different time of day:
Still having RSI issues, but fortunately, sculpting doesn’t seem to aggravate them too much if I stick to the Wacom stylus in the right hand and the 3D mouse in the left. Anyway, more base meshes to be sculpted into the Hogwarts terrain:
You can see that I switched over to the first film’s castle there. I love the way the cliffs just under the back of the Great Hall buckle inward. They create a really cool silhouette that you can see in the first couple films. That area underwent small changes in Prisoner of Azkaban and then bigger changes in Goblet of Fire. It ended up with a convex shape that I find…more realistic, but less interesting. In fact, I think that whole corner of the terrain looks best in the early versions. It’s got some cool, designy rhythms to it, with asymmetrical outcroppings leading your eye upward to the Great Hall. They’re not as evident in the base mesh, of course:
We’re off the edge of the map here. Literally – I don’t have any technical drawings that go all the way out to this corner. But that doesn’t really matter, because it turns out the drawings aren’t very accurate for the terrain anyway. I don’t have any photogrammetry of this version of this area either, so it’s just a lot of flipping back and forth between different reference photos (with different lighting, focal lengths, resolutions, image quality, etc.) and trying to match every angle I can. It’s definitely a challenge. But it’ll be worth it to be able to showcase the way the landscape changes around the castle!
Anyway, that completes the base mesh for this chunk of the terrain…time to sculpt! I was a little nervous about the terrain on the two sides of the boathouse stairs matching up, since I’m building in two completely separate chunks. So it was exciting to see them starting to visually come together as if they’re one continuous landmass!
One of the amusing parts of this technique is just how insanely weird the undersides get:
It becomes very obvious that I started out by mushing a bunch of blocky shapes together, with no regard for how the bottom looks. Why not clean it up? I might at some point. But it’d probably be more work than it’s worth. I’m gonna stay focused on the parts that are visible.
The render below really showcases the difference in detail between my first sculpting pass and my second. The stuff to the right of the boathouse steps has had the second pass, while the stuff to the left hasn’t had it yet:
Even so, that’s starting to look positively Hogwartian!
This was the point at which I jinxed things by being too excited about the results I was getting. Something went wrong and shifted the whole cliff out of alignment in a weird way…twice. Still not sure how it happened. I had to revert to an earlier auto-save and redo a bunch of work in the area below…twice. Definitely frustrating. But it would have been way worse if not for the auto-saves…thanks, Blender!
That completed the first sculpting pass for this whole chunk of terrain beneath the Great Hall. The more detailed second pass should be in the next post!
Let’s continue adding the terrain! Almost all the land from the viaduct clockwise around to the south side of the quad building changed in Goblet of Fire. That’s when the Great Hall was relocated, the viaduct courtyard replaced the Chamber of Reception, the viaduct itself changed angles slightly, and boathouse steps were reconfigured, and the footpath up to the south side of the quad building was added. I mean, the basic idea is still the same, but it changed enough that I’m going to need to do a separate sculpt for the GOF version.
Anyway, what you see here is the beginnings of the version from the first three films. (I happen to have the POA castle visible here, but it could have been any of the first three versions.)
It can be an interesting challenge to divide the terrain into these blocky shapes, especially for areas where the reference images are few and photogrammetry isn’t possible. But I’m really glad I’ve chosen this approach. It forces me to think about the big forms first – a critical skill in both 2D and 3D art, and one I sometimes neglect.
As you can see, I didn’t worry about the spots where these blocks overlapped with the boathouse stairs – I knew I’d be able to carve out the appropriate sections later. Right now, I’m only focused on everything to the right of the stairs:
In fact, as the first sculpting pass begins, you can see I’m not even touching anything to the left of the stairs:
That’s all just overflow, soon to be clipped off and replaced with a separate sculpt for that side of the stairs. By the way, the techniques here are exactly the same as the ones I previously used in this video, albeit with less photogrammetry reference. I know I could get away with following the original landscape less closely overall, but I’m trying to keep it close – partially because it’s fun, partially to indulge my perfectionism, and partially because this way I’ll be able to show how the terrain changed along with the castle.
I was relieved to find that my plan for splitting the landscape into chunks should indeed work. The seam isn’t completely invisible in this render, but it should become less obvious with further detailing and finessing:
Speaking of which…next came further detailing and finessing! I clipped off all that excess rock to the left of the stairs and sculpted smaller ridges and crags:
That render reminds me that my lake water material will need more work. It’s also a clear illustration of the difference that detailing makes – notice how I haven’t touched the rocks toward the bottom right yet, and they, like…suck.
I fixed that next!
That brings all this terrain to a consistent level of detail. I must admit, I’m realizing that some of it’s getting a little too…sedimentary. I started really going for it with the strata in some places, but when I return to the photo references for the miniature, the rock has a rather different character to it. It may help if/when I use textured sculpting brushes to add the next level of fine detail? We’ll see.
Anyway, we’ll wrap up with some orthographic views of the POA castle so far! (Backsides and undersides of the terrain have been removed for clarity.)
This post has been delayed by my repetitive strain injuries; progress is definitely slow right now. But as promised, it’s time to share my progress on the terrain surrounding Hogwarts!
The rocky crags have some rather squarish forms, so I thought I’d rough out the geometry with a bunch of separate low-poly rocks:
The idea is to create sections of rock that can be swapped in and out for different films. This entire swath of rock remained mostly unchanged throughout the films, so I was able to base the forms on photogrammetry from the Warner Bros. Studio Tour:
It may look awful like this, but it’s exactly what I was looking for. From there, I was able to start sculpting the individual crags to be more…craglike, and then using Boolean operations to join them into continuous objects for more sculpting. Here are some work-in-progress views:
I was feeling pretty good about this so far, so I started working in smaller details on the left…
…but I didn’t like the way that looked. It’s not the worst thing in the world; it’s just kinda…mushy. Indecisive. I wanted something that looked more confident, intentional, and realistic. I wanted to do better.
Fortunately, I’d saved a copy of the less detailed sculpt, so I went back and tried again. (I’d been reading Adam Savage’s Every Tool’s a Hammer – great book on creativity – and I was feeling fired up about the value of learning through failure and iteration.) This time, I more deeply studied photos of the miniature, as well as photogrammetry of the rockwork at Universal and photos of real coal. (The rocky areas of the miniature were molded from a huge slab of coal.)
The next attempt felt better:
Another difference is that I shaved off some areas on the left – I realized that those changed in Goblet of Fire, and this chunk is just supposed to be the parts that remained the same until Deathly Hallows.
Here I’ve finished that medium-scale detail pass for the whole chunk (and made the temporary gray material less shiny):
The left edge is where the terrain starts to diverge starting in GOF, the top edge is where the terrain changes in COS to accommodate the greenhouses, and the big opening at the lower right is actually how the miniature was built. (In the films, this is generally where the miniature joins up with the surrounding landscape, accomplished through digital matte paintings and CG and whatnot.)
Here’s the same shot with some texturing applied:
I’m calling that chunk finished…for now. I still need to add grass, trees, and shrubs. I also might go in and sculpt a finer, sharper level of detail, probably using textured brushes, but I’m going to see if I can get away with this level for now. It’s always a tradeoff between getting enough detail and avoiding inordinately long render times (and slow overall performance).
Want to watch the whole process come together? Check out the video!
Next I’ll need to apply the same techniques to create the rest of the landscape. Hopefully I’ll have more progress to share soon!
Today’s post is mostly a big block of text, so let’s at least start with a few random renders of the project so far:
The viaduct area in Prisoner of AzkabanThe Transfiguration courtyard in Prisoner of AzkabanThe Alnwick Castle-based training grounds in the first two films
Now for some words! Lots of them!
So up till now, my castle models have been floating in the air, hundreds of feet above the lake. But I’ve hit a major milestone in the project: I’ve begun creating the rocky landscape the castle sits on!
Here are some factors informing my approach:
Many of the films have shots that repurpose views from previous films. These create significant inconsistencies within individual films. I’m disregarding them altogether.
At least for the first six films, the environment really has to be treated as two distinct entities:
The terrain that surrounds and supports the main 1:24-scale castle miniature.
This terrain was carved out of polystyrene, with rocky outcroppings of plaster molded from slabs of coal.
This terrain is quite consistent within each film and changes incrementally between films.
The lake and mountains that surround the miniature in the films.
Typically, the visual effects team integrated photography of Scotland into digital matte paintings and layered those onto 3D geometry.
Unlike the miniature, these CG environments change drastically from one scene to the next, not to mention from one film to the next. (The second film contains a particularly dramatic example: there are two establishing shots that use similar or identical plates of the castle miniature, but the surrounding terrain is totally different.)
The upshot is that you can’t create one single environment that will be 100% consistent with every shot in a given film. You can do it with the miniature, but beyond its borders, it’s literally impossible. So my approach there will be impressionistic. Still, I gathered reference images from each film. I carefully took note of common features between films and annotated them with color coding. I even had fun unrolling some of the panning shots into rough simulacra of the original matte paintings.
But you can only do so much researching and strategizing. Eventually you’ve just got to get started! So I hit the major milestone of starting to model the landscape a few days ago…but I’m going to save the renders for the next post. I should have a video for you as well. Doesn’t look like much yet, but the work has started; I’m just having to pace myself right now because of my repetitive strain injuries. But I didn’t want to go too long without at least posting something.
Be sure to click the Follow button to get notified as more updates come!
Let’s recreate the original Whomping Willow! It was added to the training grounds in COS. That location – and even the tree’s very presence in the miniature – is unique to to that film. (In all the later films, the redesigned Whomping Willow was off the edge of the map, somewhere past Hagrid’s, and it was brought to life purely through CG and full-scale practical elements.)
The first step was to figure out the exact placement. I don’t have any floor plans that show precisely where it sat in relation to the other structures, but one of the behind-the-scenes features does give a decent shot of that area of the miniature. I lined up the camera angles and added a circle to mark the base of the tree. It seems to be just about dead center in that lawn! This further reinforces my belief that this area’s walls were redesigned for the express purpose of giving the Willow a more interesting setting. They almost create a kind of arena around it.
Next up: creating a base mesh. I knew I wasn’t going to be able to match the tree in the film perfectly, but I wanted to capture its essential rhythms, character, and scale. I ended up annotating film screenshots with color-coded numbers to help me keep track of the different major branches. It’s a strategy that served me well with the grand staircase model.
I carried that color coding into the model itself as I started the base mesh. As with the tree in the clock tower courtyard, I decided to use the Skin modifier in Blender. This lets you quickly extrude chains of vertices and apply a basic radius parameter to each, creating blocky forms that become tubular with the Subdivision Surface modifier. Here are a couple of work-in-progress shots:
As you can see, the base mesh is SUPER photorealistic. Can’t even tell it’s not a real tree! …right? (My girlfriend says it looks like a piece of corporate modern art, and I don’t disagree.)
Don’t worry, things started to get a little better as I Boolean-ed all the branches into one object and began the sculpting process.
There appear to be some stony areas at the base. I experimented with sculpting them all as one mass. When that didn’t look right, I tried using physics simulation to “drop” all the stones on top of each other in a realistic pile. But sometimes simplest is best, and in the end, it was most expedient to separately sculpt each rock and lay them on top of each other manually. Another pass of Skinned tubes allowed me to start blocking in the tree’s tangled roots:
Obviously very rough; the idea is just to build some geometry that will take well to further sculpting. And while I admit I wasn’t SUPER excited about this switch from hard surface to organic modeling, I soon found myself enjoying the sculpting process once more. It’s gratifying to see these basic shapes start to look like something!
This was around when I realized my proportions were a little off. The main trunk needed to be a little bigger relative to all the branches. I made some adjustments and kept sculpting, working my way up into the knuckles and knobs where all the younger shoots will soon go:
None of this is an absolutely perfect match with the film, but I’m certainly trying to stay close. That crevice on the left side of the trunk is based on one visible in the film; in my headcanon, that’s where the tunnel to the Shrieking Shack is. (We only see the entrance to the tunnel in the next film, and the Willow was redesigned for that one.)
By the way, in case it’s not obvious, I haven’t started texturing the tree or the rocks yet. The flat coloration is just temporary while I continue refining the forms. I’ll save all that for the next post, as well as the addition of all the shoots on top that’ll really give the tree its characteristic look. But I think we’re off to a good start!
I promise we’re going to get to sculpting the decorative dragons from the tops of the greenhouses, but first I wanted to share a “before and after”. A reader who goes by kronkolweg pointed out that my castle’s bricks were a little big. It had already been starting to bug me a bit, and this was just the kick I needed to get off my butt and fix it.
For the original castle miniature, one or more brick textures were hand-sculpted, molded, mass-produced in FastCast resin, and glued to the miniature’s wooden understructure before being hand-painted. There was a transition to more detailed plaster-based textures starting in Chamber of Secrets – I’m not sure if any of the original resin brick textures ultimately survived through to the final Half-Blood Prince iteration of the miniature. In any case, the overall effect is the same, and my procedural brick material mimics it without requiring me to individually texture each wall. The thing is, when I created this material (as documented here, here, and here), I had much less of the castle built, which meant I had fewer points of comparison for the scale of the bricks. Frankly, I don’t remember how much actual measurement there was, as opposed to simple eyeballing, but it’s become clear that the results are a little oversized.
So, being the Excel nut that I am, I sat down and made a spreadsheet. I took horizontal and vertical brick counts for various areas of the castle, comparing my model to the miniature. There’s a certain margin of error in the scale of my castle, and the bricks of the miniature are not necessarily of completely uniform scale, so I averaged the different measurements and arrived at my brick adjustments: a 34% reduction in width and a 21% reduction in height.
The interactive sliders below compare the old larger bricks (left) to the new smaller bricks (right):
The difference is subtle from any real distance, but it’s more accurate now, which always feels good.
With this tweak completed, I shifted my attention to those greenhouse dragons! Fortunately, they’re all identical, so I only had to sculpt one. I did so in a separate file, and – well, if you’re interested, just watch part 1 of the video.
Frankly, I can’t get enough of these sliders, so let’s compare the base mesh to the full-resolution sculpt…
…and now comparing the full-resolution sculpt to the retopologized version with normal mapped details:
If the differences seem really minor…good! The point of retopo is to vastly simplify the geometry, which makes the asset a lot more manageable. The sculpt on the left has over 1.3 million faces; the retopologized version on the right only has around 1,500. Much easier on the computer! Of course, that eliminates a lot of details; baking and applying a normal map is a way of faking those back in, hopefully with an end result that’s nearly indistinguishable from the original sculpt. (In this particular case, there are a few small artifacts in the shading, but these are not noticeable when color is applied and we move the camera away a little.)
You can watch this whole process in part 2 of the video:
The retopology process is still a lot slower, harder, and more frustrating for me than I’d like, but in the end I was satisfied with the result, so I created an appropriate material, brought the mesh over into the main castle model, and duplicated it to the appropriate spots on the single greenhouse I’d already created. Voilà!
That’s a wrap for the dragon, and for this greenhouse overall! The next steps will be to duplicate this greenhouse and create the other two design variations on it. Then I’ll be able to move on to the domed conservatory, the curtain walls surrounding the greenhouses, and hopefully some ground cover and footpaths. Be sure to subscribe to this blog and the YouTube channel for updates as they come!
As we’ve seen, POA featured some significant additions to the castle’s architecture, many of which were anchored by the new clock tower in the southwest corner. The last remaining piece of this section was the small gatehouse at the end of the wooden bridge. This came together easily; the only real question was how big to make the torch, since its size (relative to the building) differs significantly between the miniature and the full-sized set built at Glencoe. I ended up using the same scale as some of the castle’s other torches, which resulted in me kinda splitting the difference between the two sizes.
Believe it or not, that brings the POA additions to something of a complete state!
The south wing as a whole is still not complete, since I haven’t touched the quad interior due to scarcity of reference material. I also still need to add the walkway that connects the Chamber of Reception to the quad, but I’m holding off for the same reason.
Knowing this, I decided it was just about time to turn my attention to the castle’s north wing, much of which is derived from Durham Cathedral and Alnwick Castle. There were just a few odds ‘n’ ends to finish up first, like the fleur-de-lis pattern at the back of the Great Hall (bottom right):
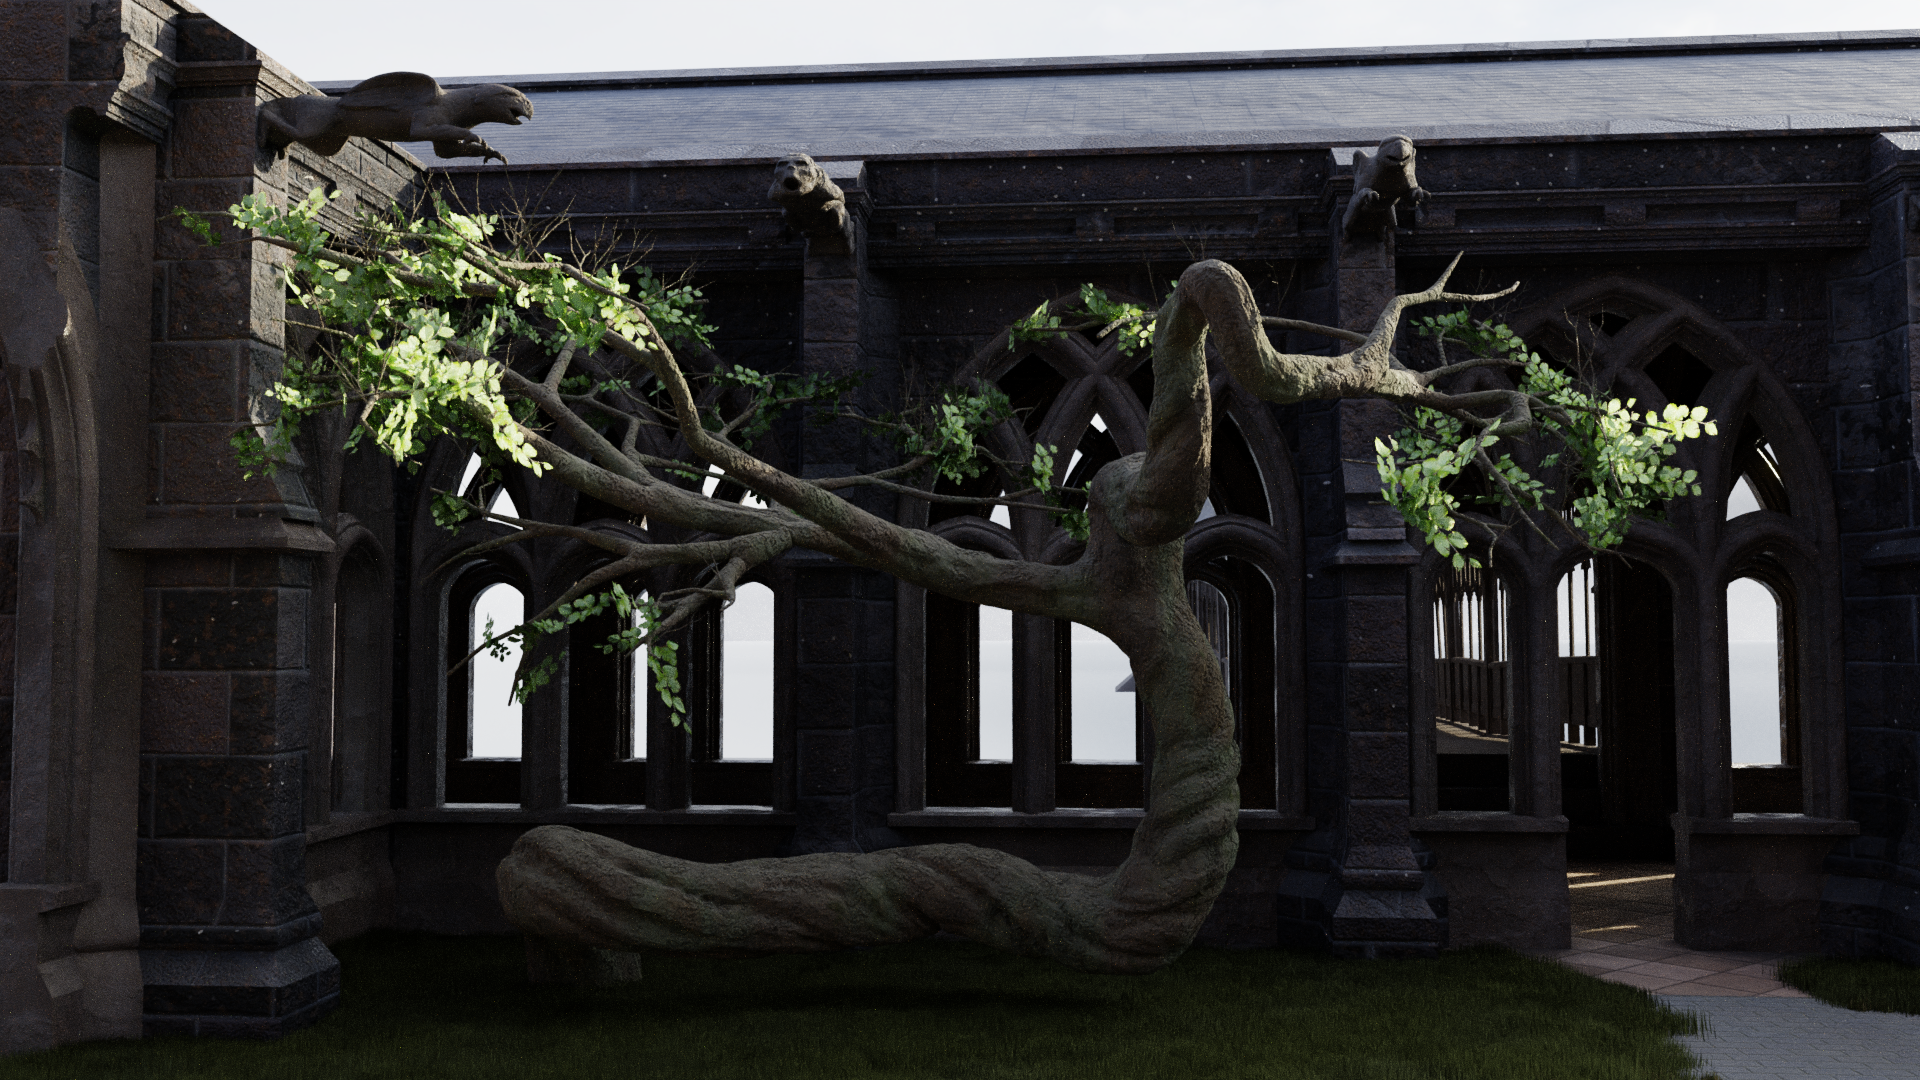
Another miscellaneous item was the tree in the clock tower courtyard where Buckbeak’s executioner sits to sharpen his blade. It was fun creating its forking, branching paths by hand, following what we see in the film for the trunk and larger branches, then just going crazy with the smaller branches. I allowed Blender’s Skin modifier to bulk it all out into a basic three-dimensional form:
Whoops…I realized I’d forgotten to add the steps leading up from the courtyard to the wooden bridge. I added those, sculpted a bit more detail into the tree trunk, and used a particle system to add some leaves.
Next came ivy to help the courtyard feel a little more overgrown and wild:
I also spent some time grappling with Blender’s Mantaflow fluid simulation engine, trying to get convincing smoke to furl from the castle’s chimneys. It took the better part of a day for me to figure out that my baking errors stemmed from an apostrophe in the cache folder path (a folder descriptively named “Joe’s Stuff”). With that finally resolved, I was able to get some smoke in there:
After all the frustration, I really like how it turned out! I think that’s a nice note upon which to end the work on the south wing, at least till I can find more reference for the POA-era quad. Next we turn to the north wing, starting with the Durham section!
Let’s return to the clock tower courtyard. With the fountain in the center finished, I decided to now enclose it with the courtyard itself. Existing as a full-scale set and as miniatures at 1:24 and 1:10 scales, the courtyard was designed for the third Potter film and is surrounded by aged cloisters and overgrown vegetation. There’s a lot of complex geometry to capture. I compared photogrammetry, production stills, technical drawings, film frames, shots from the Warner Bros. Studio Tour, the similar courtyard in front of the castle in films 4-6, the larger version thereof in the final film, etc., etc. Eventually, I felt like I had a decent understanding of the space.
One thing I’d never noticed before was that there are actually two different designs to the arched tracery of the cloisters:
The one on the right is taken directly from Durham Cathedral, lending stylistic unity with the location shoots from the first two films. I’m not sure if the one on the left is taken from a real-world location, but it’s certainly very similar to a lot of real Gothic tracery out there. That one is used primarily in the sections of these cloisters without a roof.
As with the fountain, my first task was to create the courtyard in a more-or-less pristine state, without any of the damage or erosion to be added later. (Adding the ground is a logical last step so I don’t have to worry about it blocking my view of the blueprints beneath the model.) Notice how the last arch on the right has the Durham tracery design:
The courtyard has elongated gargoyles placed at intervals around its interior, and while they look similar, there are actually two designs that alternate: a hippogriff and a centaur, although they’re so stylized that I had to study them for a while to figure out what they were depicting.
When they repurposed the clock tower courtyard set for the viaduct courtyard after Prisoner of Azkaban, they kept these gargoyles in place, providing a lot more visual reference. (Interestingly, while the gargoyles also made it into the larger version of the viaduct courtyard for Deathly Hallows, their features are much more sharply defined and less eroded in this version. I decided to split the difference for the purposes of my model.)
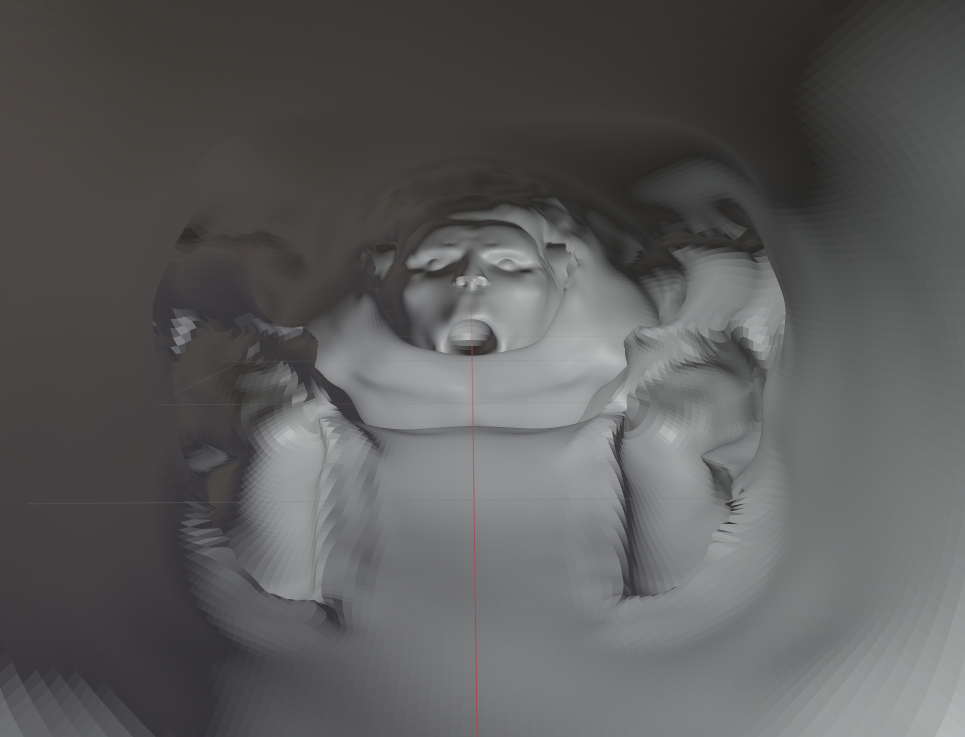
For the centaur design, I even had the benefit of a pretty accurate orthographic drawing published in The Art of Harry Potter. I based my Blender sculpt on that drawing and then baked a normal map onto a simplified version, much like I did for the fountain statues, although I didn’t bother with manual retopology – I knew this guy would never need to be rigged, posed, or animated, so I just let the Remesh modifier take care of the simplified topology for me. Anyway, you’ve already seen me go through this with the fountain statues, so instead of boring you with similar images, I’ll share this unique WIP view of the centaur sculpt from the inside:
Enjoy your nightmares.
Anyway, here’s the completed centaur design in situ, with some procedural noise layered onto the normal map baked from the sculpt:
I made the mistake of not putting much work into the base mesh before sculpting this guy, so there were some areas of the sculpt that got dicey. The hippogriff fared better because I took the time to create a proper base mesh, like I had with the eagle sculpt. See, what a cutie! (I didn’t have original ortho drawings for this one, so I was wingin’ it. Heh.)
I tried to again use the Remesh modifier for my lower-poly version, but it didn’t work as well on this fella. Sharp parts like the beak and claws did not work well at all. Back to manual retopology! Oh well, it’s good practice, and a good opportunity to improve upon some of the poor topology on the eagle statue. My brain is not wired to easily just throw down perfect edge loops.
By the way, if the term “normal map” doesn’t mean anything to you, here’s what the one for the hippogriff gargoyle looks like:
The different colors essentially tell the software to pretend the surfaces point in slightly different directions than they actually do, thereby simulating details that aren’t actually there. Blender “bakes” these maps by comparing the surface of the simplified mesh to the original sculpt.
Here’s the end result:
The tricky thing with this one is that the front legs seem to have fallen off many of the gargoyles in the clock tower courtyard and the original viaduct courtyard, but the ones in the larger Deathly Hallows viaduct courtyard are intact. I think I’m just gonna keep the legs for the time being.
Here’s where we’ll leave off for today. In a future post, we’ll build the remaining walls of the courtyard and damage the appropriate areas.