The Long Gallery & Starting the Bell Towers

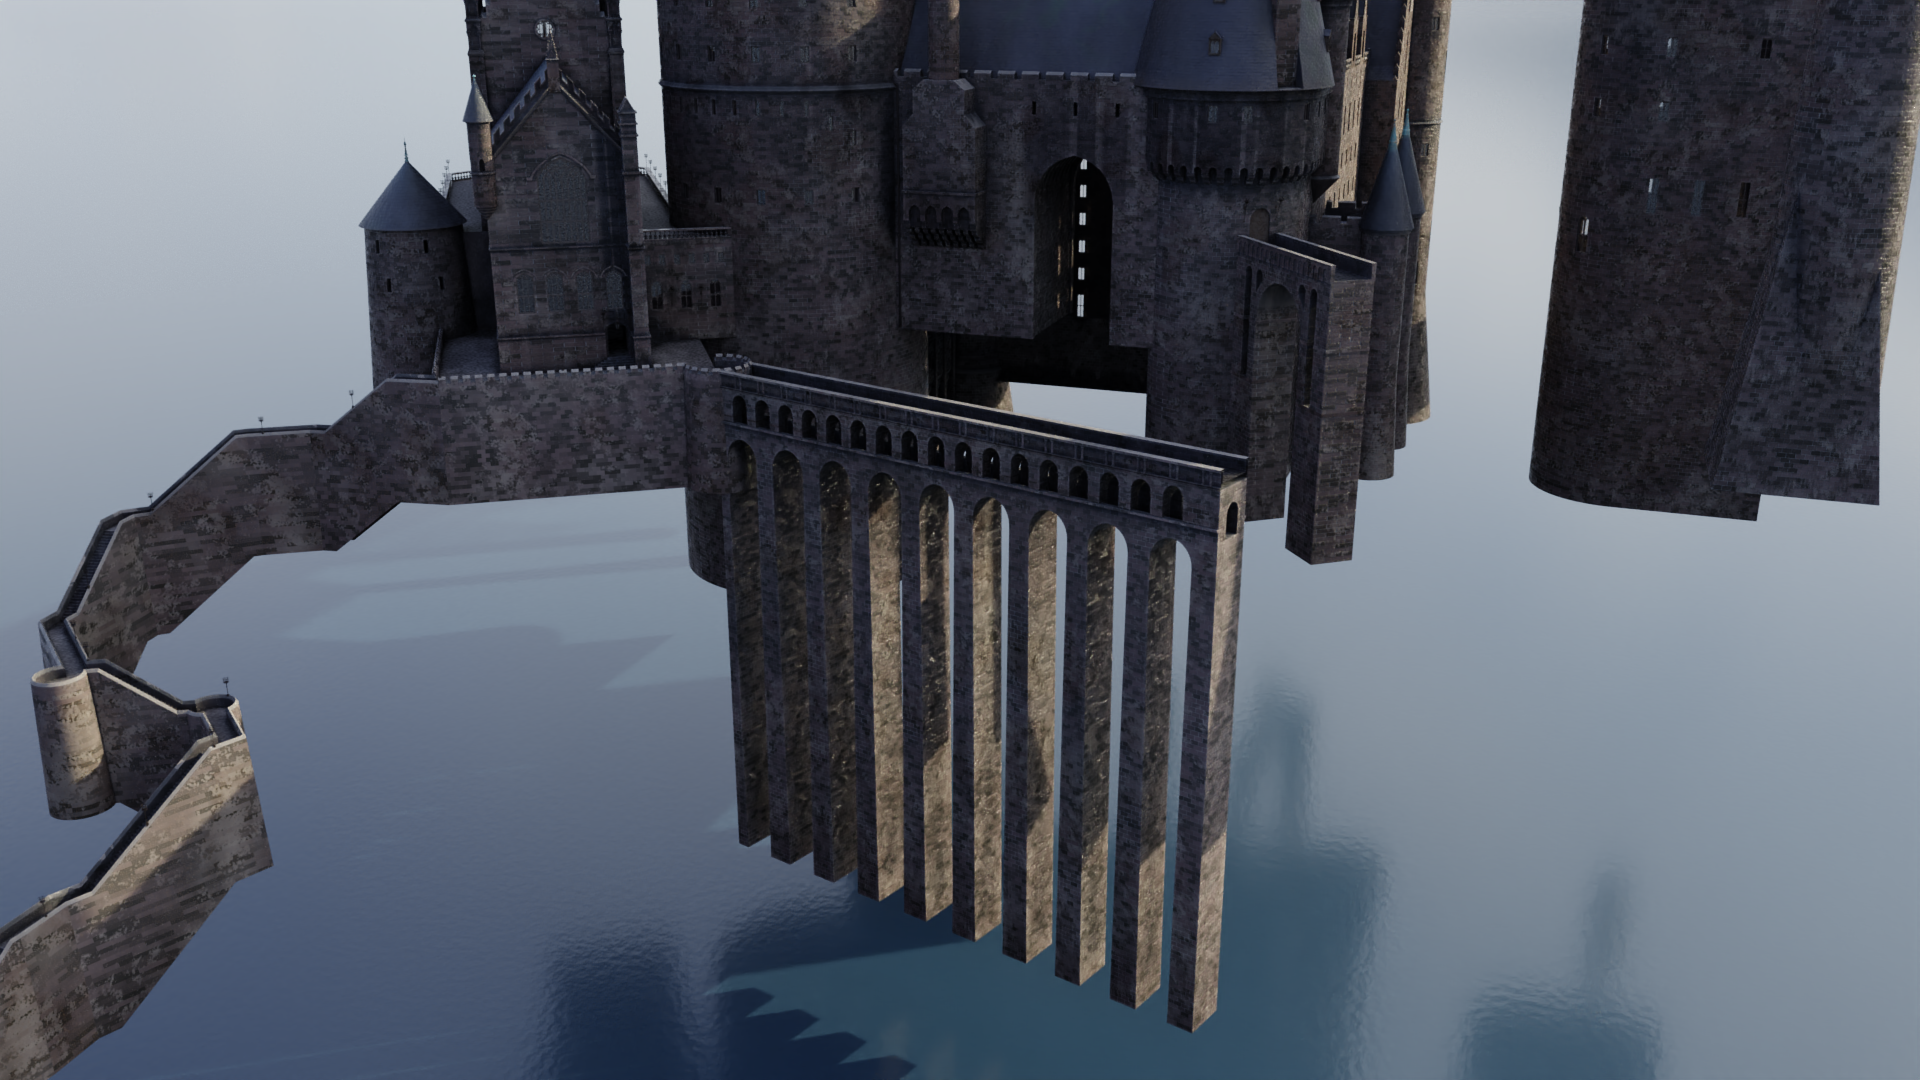
Work on my 3D model of the Prisoner of Azkaban castle continues! The area that corresponds to Durham Cathedral’s north transept is now complete:

I shifted my way attention to the adjacent walls that correspond to the cathedral’s nave and north aisle, otherwise known at Hogwarts as the Long Gallery. I was surprised to notice that the windows and buttresses are not evenly spaced. In fact, the upper windows don’t even align with the lower windows. I fought this briefly, thinking I must be mistaken, but nope, I’m pretty positive none of this stuff lines up in the miniature – and not in ways that match the imperfections of Durham!

I wanted to match the miniature as closely as I could, so I started by adding placeholders for the bell towers at the other end of the Long Gallery to help me lock in my spacing:

The stand-ins are shorter than the talent, and their faces are kinda blank, but hey, what are you gonna do.

At this point I discovered that my entire Long Gallery area was about a foot too far east, so I took a few minutes to shift it over and swivel the viaduct accordingly (a whopping 0.25°). A foot’s not a lot – at 1:24 scale, that comes out to half an inch in the miniature – but it helps to line things up as closely as I can.

With that done, I blocked in the walls and roofs of the long gallery:

Then came the details, with all their subtly variable spacing. Here’s an orthographic view from the side – a perspective-less elevation view, in other words. All the misalignment is totally intentional, and it should be pretty accurate (although I made further tweaks after this render).

Of course, it’ll look better once the far side is enclosed as well; I’m not working on that courtyard side yet.

In the meantime, my next task was to create the 15-foot-wide octagonal tower on the roof of the Long Gallery. This was added in Chamber of Secrets; my guess is that it was a purely aesthetic decision, perhaps motivated by the fact that the establishing shot of the greenhouses shows that area more clearly than we had seen in the first film.

Pretty quick add, and it never changed in any of the later films. Just gotta make sure I exclude it from the eventual Sorcerer’s Stone version of the model!

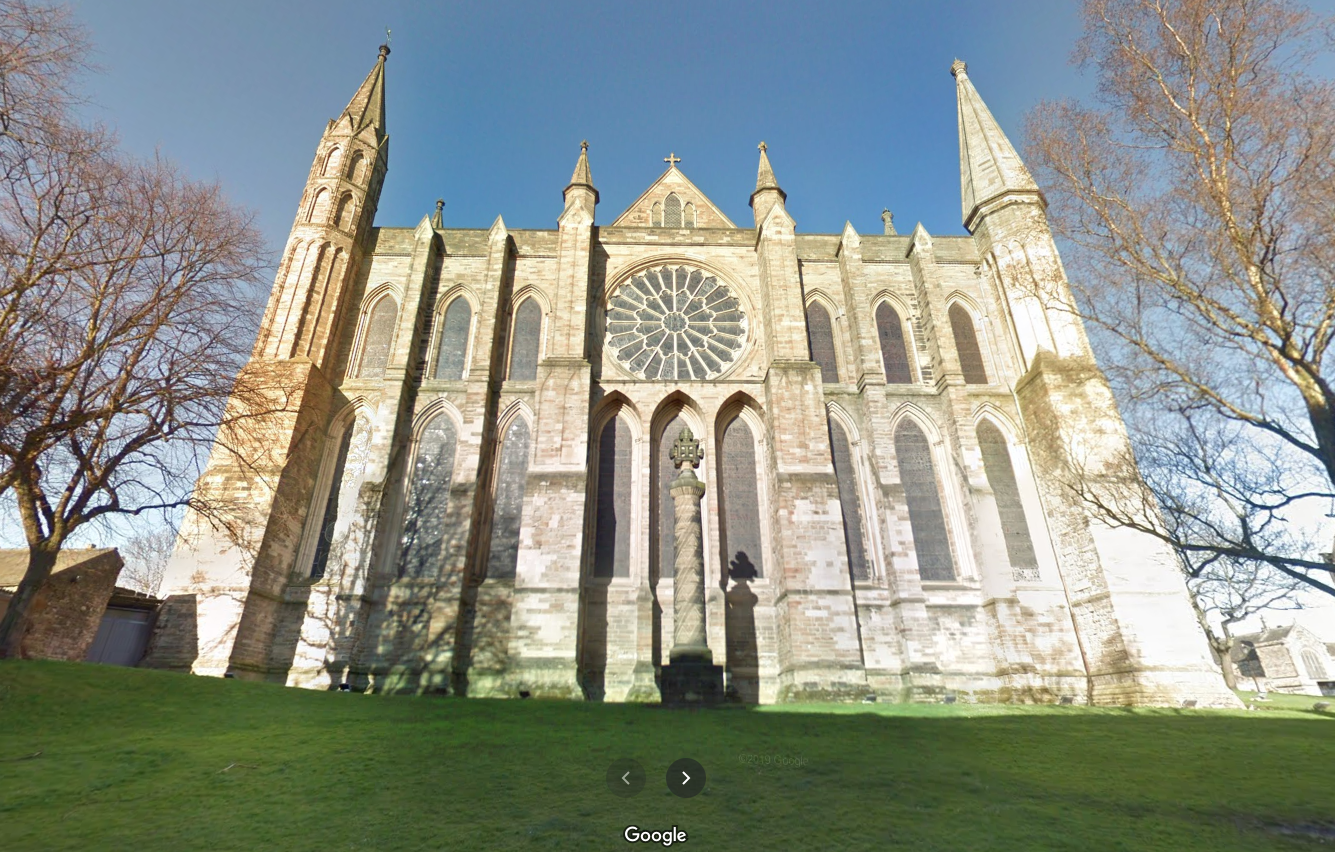
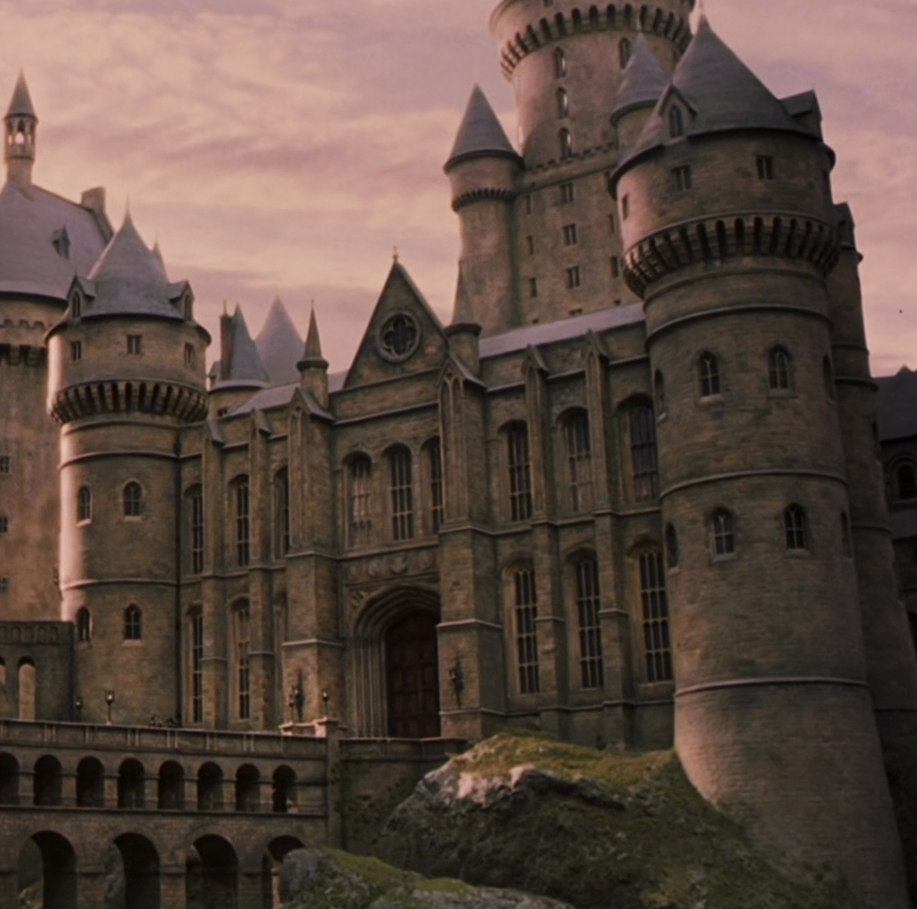
Next up? The bell towers! While the central tower isn’t very similar to the one at Durham Cathedral, the bell towers have a lot more in common with their Durham counterparts, the North and South Galilee Towers. In fact, the basic impression of the original design in the first two films is that they’ve simply knocked a few of the pinnacles off and added a conical roof to each tower. (Closer inspection does reveal some subtle differences in the details, as with all the Durham areas.) In Prisoner of Azkaban, the conical roofs were replaced with taller belfries and octagonal spires that echo the redesigned central tower, but the lower sections still bear a striking resemblance to Durham Cathedral. They also get a lot more intricate than the central tower, which makes them a little intimidating. I decided to start with the bottom portion, which is all based off stuff I’ve already made:

Now for the hard stuff! Okay, it’s not exactly hard…it’s just…a lot.

Halfway there:

The openings are tricky. In some shots in the early films, you can very unambiguously see straight through from one side to another, but in some photos of the miniature from the Warner Bros. Studio Tour, it looks like there are interior walls. After finding other photos that seem to show straight through in the Studio Tour as well, I decided to keep mine hollow, as you see above. Hopefully that’s still accurate to the later films.

Next time we’ll finish the bell towers, add the wall between them, and continue around this northern part of the castle!

Across the Viaduct!

With the SS/COS grand staircase side project complete, let’s hop back over to the main model!

The basic layout of Hogwarts in all the films is divided into two halves – a wing to the south where you have things like the Great Hall and the marble staircase tower and Gryffindor Tower, and a north wing that’s largely based off of real-world architecture at Durham Cathedral and Alnwick Castle. There are three footpaths that connect these halves:

  • The viaduct, which is by far the most noticeable, as it’s the largest and it’s situated right out front. This one goes all the way back to Stuart Craig’s early concept designs, and it stayed virtually unchanged all the way till Deathly Hallows, when it was enlarged and reoriented to become the main route into the school. (A new stairway was added so that there were still three paths connecting the halves of the castle.)
  • The stone bridge, which is much shorter and rather higher up than the viaduct, but still quite visible. It also dates back to the early concept art.
  • The suspension bridge, which isn’t seen particularly often but remained more or less unchanged throughout the films; it just moved around a little.

Each of these was in a different state in my model: the viaduct didn’t exist at all, the stone bridge was complete, and the suspension bridge existed as an early attempt that I hid sometime last year. I decided to hold off on that till later, but I did need to get the viaduct in place so I could start work on the north wing!

There’s a lot of good reference out there, so the viaduct wasn’t particularly difficult:

You may notice I’ve begun adding some subtle atmospheric perspective or mist to some of these renders…it can really help provide some depth and separation, particularly since the entire castle is pretty homogeneous in terms of color and texture. That’s becoming more important as the castle continues to sprawl further and further out.

Anyway, with the viaduct completed, I turned my sights to the so-called viaduct entrance – as in, the entrance to the north wing from the viaduct, not the entrance to the viaduct. It’s framed by two towers that remained largely unchanged throughout the films; their spires just got a little steeper in Order of the Phoenix. They also added a window to Snape’s dungeon at the base of the one to the left, but that’s hidden from a lot of angles…and since I’m working on the Azkaban version of the castle right now, I don’t have to worry about that yet anyway.

I began adding the left tower, as well as the semicircular area at the end of the viaduct. This is also a nice silhouette of the stone bridge in the background:

Once the details started really coming together, including the shallower spires seen prior to OOTP, I mirrored the left tower to the right side as well. (The two are identical, other than the fact that one of the windows on the left tower is replaced by a door to the stone bridge.)

Here they are complete!

That smoke sim is paying dividends…I’m really digging in in this render.

The wall that connects these two towers is interesting. It forms the southernmost face of the so-called long gallery, sometimes even just referred to as the Durham building because as I said, so much of its design is based off of Durham Cathedral. That cathedral was a real-world filming location for the first two films, and there are some areas of the miniature that follow its design pretty slavishly so as to meld well with the location shoots.

This south wall, though, corresponds to an area of Durham never seen in the film. This what it looks like in real life, courtesy Google Street View:

Since they never shot any scenes right here, there was freedom to modify the design for the visual effects miniature, which looks like this:

As you can see, the miniature retains the overall shape and dimensions, but many of the details have been changed. The large rose window is replaced with a much smaller and less “churchy” version, and front doors have been added – front doors that are identical to the doors to the Great Hall, which are in turn identical to real-world doors at Christ Church at Oxford. (The doors are, however, scaled up to about twice the size – nearly 30 feet tall in the imagined real-world scale the miniature represents!) The windows are very Oxfordesque as well.

Anyway, I began adding this south wall:

I didn’t have to create those huge Oxford doors completely from scratch this time…the archways in the grand staircase side project are variations thereof, so I was able to bring one of those archways into this file and modify it appropriately. (I admit it’s kind of a hodgepodge of super-precise areas and others that are merely close to correct…ssshhh, don’t tell anyone.)

I then added the four house crests – plus the main Hogwarts crest – above the door, using bump maps to simulate the relief. Here’s a student’s-eye view from the viaduct:

It’s especially nice now that I remembered to make the windows visible! Ignore the light under the doors though.

I don’t know why I was psyching myself out prior to starting the viaduct entrance…I had this weird gut feeling that it wasn’t going to look right, or I wouldn’t be able to get the dimensions to all agree with each other, or something…but I really like the way this is turning out! Stay tuned for more updates as I add windows, the triangular area with the small rose window, and the two small spires on either side!