Short post today. I finished the clock tower! The only two pieces I still needed to add were the big window in back and the enormous pendulum that hangs down through the entry. Both are now in place! (I’d avoided the window for ages because I couldn’t find a clear shot of the tracery. Then I randomly came across a shot of a window at King’s College Chapel and realized that it was the exact same design. Problem solved!)
Around the other side of the building, I’ve been really hesitant to finish the hospital wing because the placement of the detailing toward the bottom will depend on the detailing of the surrounding quad walls, and I haven’t been able to add those due to insufficient reference. But I bit the bullet and at least took care of the top section:
I’ll still need to add the windows and so forth down below once I’m able to complete the quad. In the meantime, I’m gearing up to probably tackle the (gulp!) wooden bridge next.
After creating the major building blocks of the clock tower courtyard, it was just a matter of carefully putting them all together. Here’s a first render with the modeling all finished:
This, of course, is the courtyard in relatively pristine condition, but it’s supposed to be rather run-down and overgrown. As with the fountain, I used Boolean modifiers to knock out chunks of the appropriate walls and arches. The great thing about this method of destruction is it’s…well, non-destructive. Everything is still there – it’s just hidden.
As I added some different ground textures, I also started layering in vegetation – a first for this project. Blender’s hair simulation allowed me to grow pretty satisfactory grass along the courtyard. I weight-painted the distribution so so it would clump around the fountain, walls, and columns. This clumping does vary between films and between sets/miniatures; I aimed to split the difference in a way that felt natural. (I haven’t worked much with particle systems…imagine my surprise and delight when I discovered that my render times barely took a hit!)
It’ll need more work, but it’s more grass than I had before!
Let’s return to the clock tower courtyard. With the fountain in the center finished, I decided to now enclose it with the courtyard itself. Existing as a full-scale set and as miniatures at 1:24 and 1:10 scales, the courtyard was designed for the third Potter film and is surrounded by aged cloisters and overgrown vegetation. There’s a lot of complex geometry to capture. I compared photogrammetry, production stills, technical drawings, film frames, shots from the Warner Bros. Studio Tour, the similar courtyard in front of the castle in films 4-6, the larger version thereof in the final film, etc., etc. Eventually, I felt like I had a decent understanding of the space.
One thing I’d never noticed before was that there are actually two different designs to the arched tracery of the cloisters:
The one on the right is taken directly from Durham Cathedral, lending stylistic unity with the location shoots from the first two films. I’m not sure if the one on the left is taken from a real-world location, but it’s certainly very similar to a lot of real Gothic tracery out there. That one is used primarily in the sections of these cloisters without a roof.
As with the fountain, my first task was to create the courtyard in a more-or-less pristine state, without any of the damage or erosion to be added later. (Adding the ground is a logical last step so I don’t have to worry about it blocking my view of the blueprints beneath the model.) Notice how the last arch on the right has the Durham tracery design:
The courtyard has elongated gargoyles placed at intervals around its interior, and while they look similar, there are actually two designs that alternate: a hippogriff and a centaur, although they’re so stylized that I had to study them for a while to figure out what they were depicting.
When they repurposed the clock tower courtyard set for the viaduct courtyard after Prisoner of Azkaban, they kept these gargoyles in place, providing a lot more visual reference. (Interestingly, while the gargoyles also made it into the larger version of the viaduct courtyard for Deathly Hallows, their features are much more sharply defined and less eroded in this version. I decided to split the difference for the purposes of my model.)
For the centaur design, I even had the benefit of a pretty accurate orthographic drawing published in The Art of Harry Potter. I based my Blender sculpt on that drawing and then baked a normal map onto a simplified version, much like I did for the fountain statues, although I didn’t bother with manual retopology – I knew this guy would never need to be rigged, posed, or animated, so I just let the Remesh modifier take care of the simplified topology for me. Anyway, you’ve already seen me go through this with the fountain statues, so instead of boring you with similar images, I’ll share this unique WIP view of the centaur sculpt from the inside:
Enjoy your nightmares.
Anyway, here’s the completed centaur design in situ, with some procedural noise layered onto the normal map baked from the sculpt:
I made the mistake of not putting much work into the base mesh before sculpting this guy, so there were some areas of the sculpt that got dicey. The hippogriff fared better because I took the time to create a proper base mesh, like I had with the eagle sculpt. See, what a cutie! (I didn’t have original ortho drawings for this one, so I was wingin’ it. Heh.)
I tried to again use the Remesh modifier for my lower-poly version, but it didn’t work as well on this fella. Sharp parts like the beak and claws did not work well at all. Back to manual retopology! Oh well, it’s good practice, and a good opportunity to improve upon some of the poor topology on the eagle statue. My brain is not wired to easily just throw down perfect edge loops.
By the way, if the term “normal map” doesn’t mean anything to you, here’s what the one for the hippogriff gargoyle looks like:
The different colors essentially tell the software to pretend the surfaces point in slightly different directions than they actually do, thereby simulating details that aren’t actually there. Blender “bakes” these maps by comparing the surface of the simplified mesh to the original sculpt.
Here’s the end result:
The tricky thing with this one is that the front legs seem to have fallen off many of the gargoyles in the clock tower courtyard and the original viaduct courtyard, but the ones in the larger Deathly Hallows viaduct courtyard are intact. I think I’m just gonna keep the legs for the time being.
Here’s where we’ll leave off for today. In a future post, we’ll build the remaining walls of the courtyard and damage the appropriate areas.
Okay, time to wrap up the fountain in the clock tower courtyard from Prisoner of Azkaban!
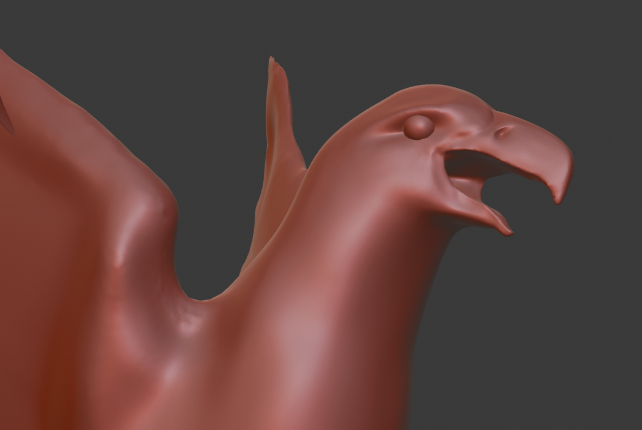
First up – finishing the statues. I believe the original Mexican symbology has the golden eagle perched on a prickly pear cactus, but the base of this statue appears to be a nondescript rock, and that’s what I’ve modeled it after. It was fun to glob that together with Blender’s “clay strips” sculpting brush; I also rigged and posed the eagle’s mouth and claws to hold the rattlesnake, whose body started as a squiggly Bezier curve with a circular cross-section. I enjoyed trying to match the sinuous, energetic gesture of the original.
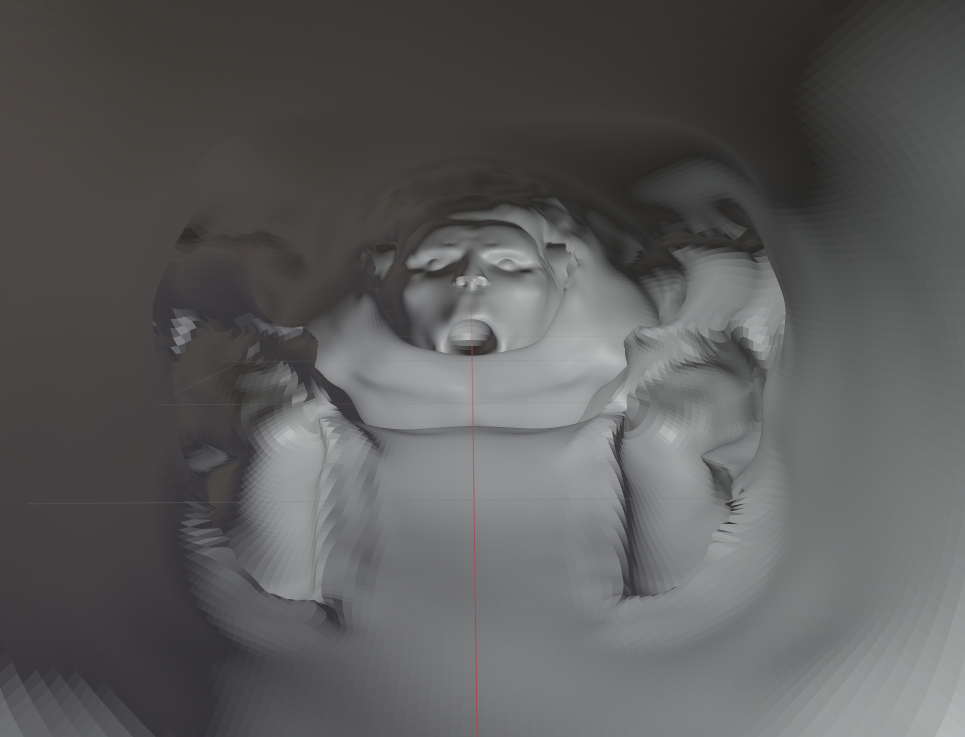
The snake’s head was sculpted separately with its jaws already fully open…no need to worry about rigging and posing this fella. Good reference is scant for the head; as with the eagle, I relied on photos of real animals to help me fill in the gaps, but it was surprisingly hard to get a good “likeness.” Oh well…at least I planned out the retopology a little better than with the eagle. That enabled me to graft the head onto the body and bake a normal map from the head sculpt. He still looks kinda funky without fangs, but they appear to have been weathered away in the film.
With that, the only things remaining were integration with the main model and damage/erosion! Not too shabby-looking, right?
Integrating this into the main model ended up being very easy. There are four statues: one at each corner of the fountain. As I placed these, I spotted some angles and proportions that were a little off, but I suppose that’s the downside to working on the statue in its own file. Oh well. The complete fountain still looks pretty cool!
I suppose it’s a little misleading to describe the fountain as “complete” when it didn’t actually have…you know…a fountain…so let’s run some fluid simulation!
Not great, but it’ll do, especially because we won’t normally be this close.
The last step with this fountain was to destroy it a little. There are big chunks of it that have crumbled away. After creating some jagged meshes to cut these away with Boolean modifiers, I arrived (after over 2 weeks of on-and-off work) at the complete fountain!
When we last visited the statue of a certain golden eagle gobbling up a certain rattlesnake from a certain courtyard in the third Harry Potter film, I’d created a base mesh for the initial sculpt in a separate file…
…but I’d temporarily given up when the flight feathers proved more challenging than I’d expected. Although I didn’t share this last time, I’d actually gotten the head off to a decent start, especially for an artist who doesn’t do much sculpting:
But those dang wings were confounding me. Sculpting them was giving results that were messy and uneven, so I decided to try modeling each feather as its own mesh. This seemed more promising, but I still couldn’t get the feathers to “flow” nicely. They have a lovely sweeping three-dimensional curve to them in the film and I wanted to capture that.
After taking a few days off to stew over this frustrating problem, the right method became apparent. I created four different feather shapes/rotations/positions (absolute shape keys, for my fellow Blenderheads) and allowed Blender to…well, blend between them. After playing with them for a while, I finally arrived at a result I could feel good about:
I’m sure there’s an ornithologist somewhere out there having a heart attack over the anatomical tomfoolery on display here, but whatevs. At a certain point, I have to remind myself that this statue is just a tiny part of a much larger just-for-fun model – and only certain versions thereof, at that. It’s not lost on me that I’m putting more effort into this statue than is really necessary for the purposes of this project, but I view it as an opportunity to learn and practice organic modeling skills that I’ve tended to neglect.
Anyway, I began creating some basic materials and threw in a background HDRI for lighting. The same shape key technique worked for the tail feathers…
…but not for the finer, more textural plumage on the body. So I used Materialize (another piece of freeware) to help me create a textured sculpting brush from photography of real eagle feathers. Back in Blender, I used this brush to directionally “paint” three-dimensional feathers along the body. This gave me a great base texture; I reshaped parts of it by hand to create more convincing layers of feathers. Should be good enough, considering that this will mostly be seen from further distances.
I thought the legs and feet were going to be hard, but they actually turned out to be a lot of fun:
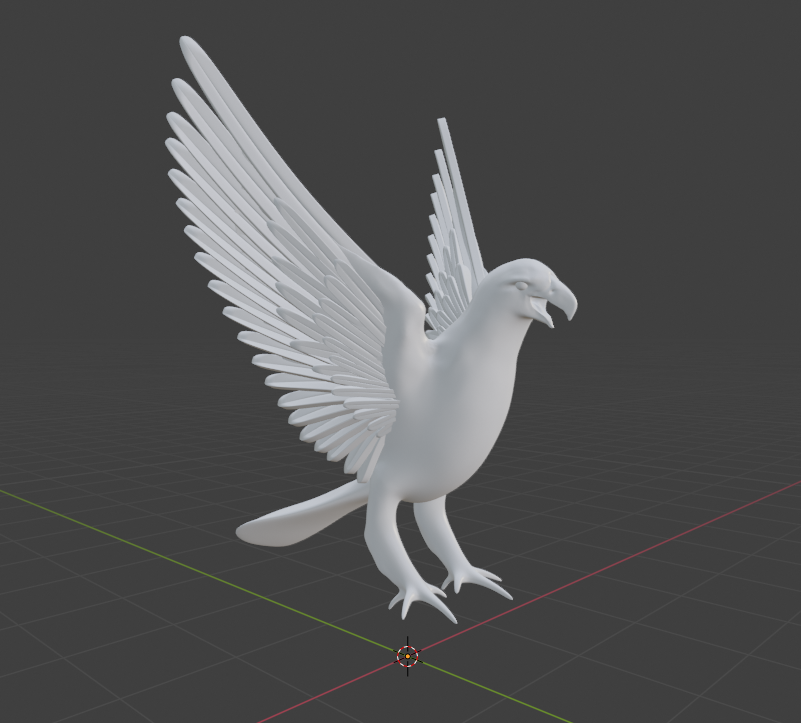
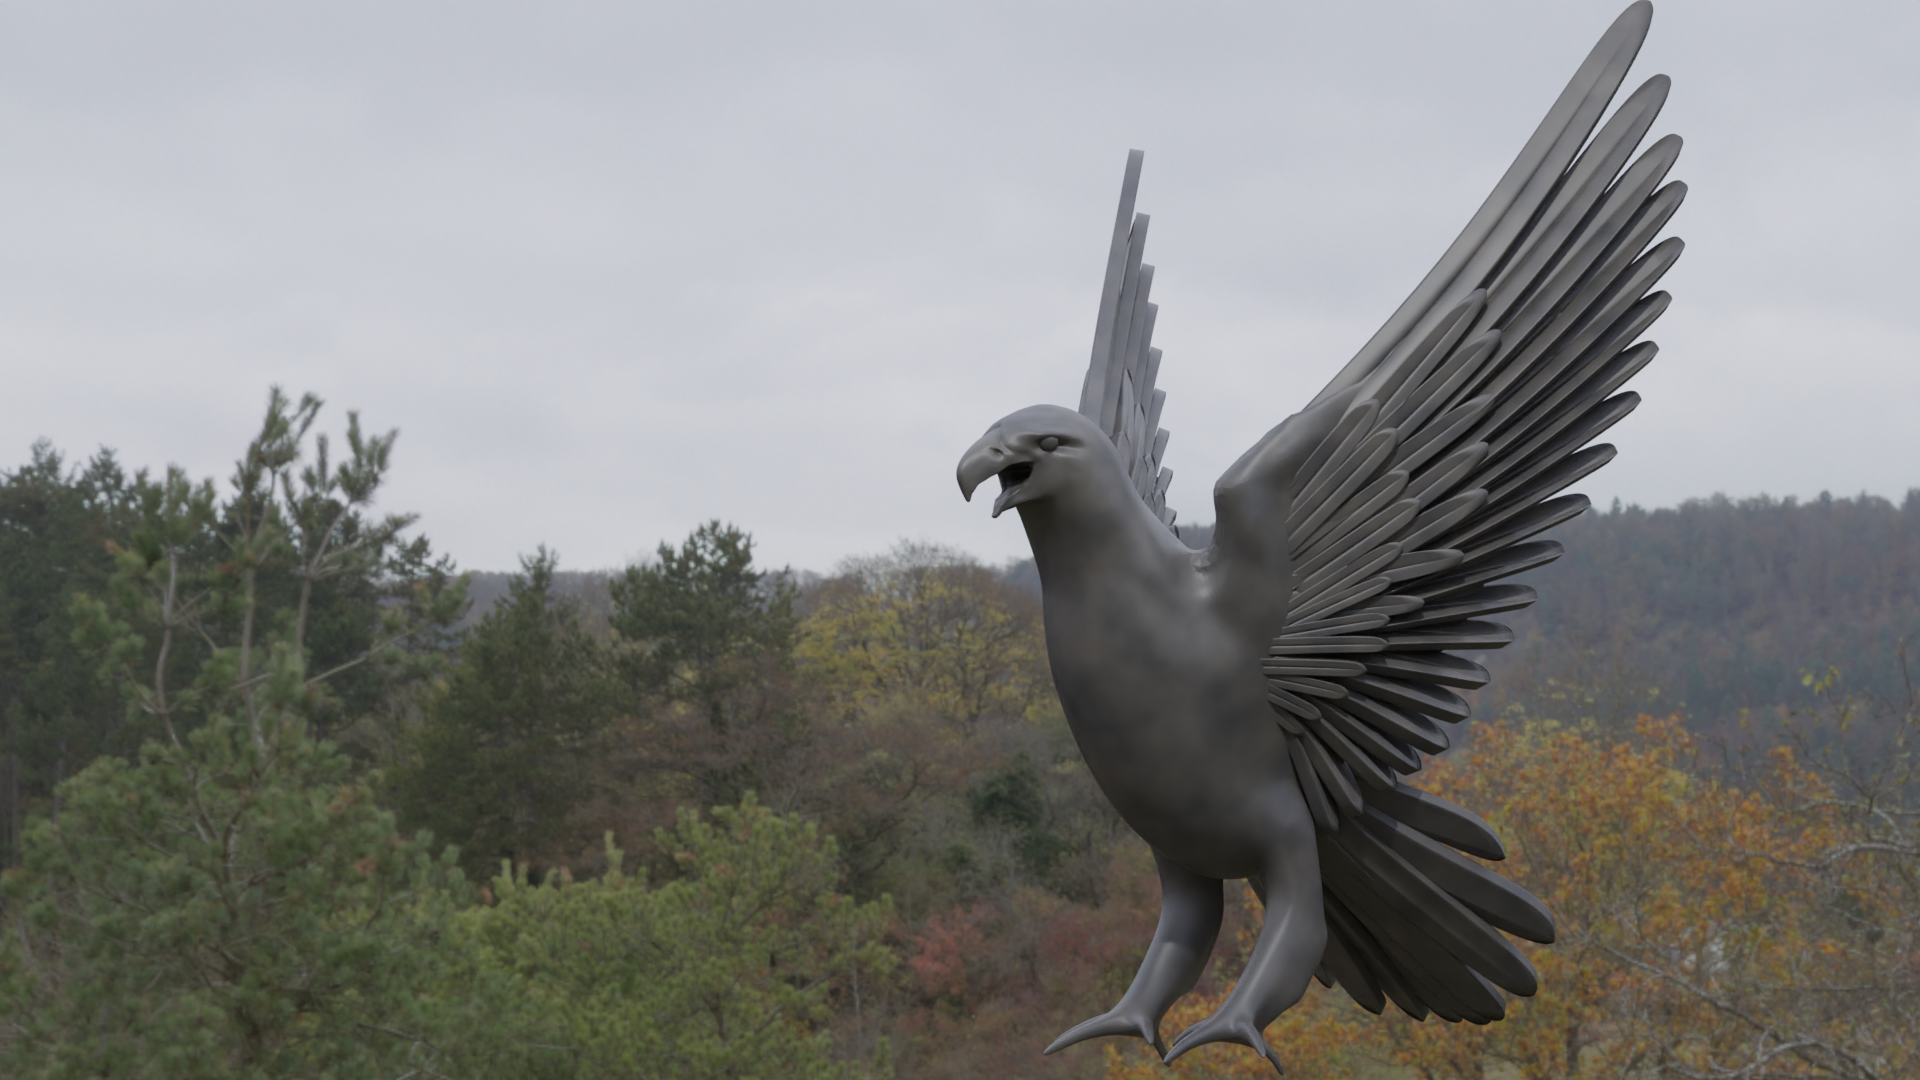
This brought the sculpt of the golden eagle to a state of completion! But at this point, this was all still real geometry – millions of tiny flat triangles connected together to form a complex, bumpy surface that slowed my computer down quite a bit. That’s where normal maps come in. I retopologized the statue into a nice, simple, clean mesh*…
…and then I baked all the details from the original sculpt into a normal map, an image that simulates the shading of the original detailed sculpt on the new simplified mesh. The result looks virtually identical, but the simplified model is waaaaaay less sluggish in terms of software performance, render times, and animatibility. (Shut up, I’ve decided it’s a word now.)
Next steps: creating the rattlesnake, posing the eagle to hold it, integrating the whole statue into the main model, and damaging the fountain to match its dilapidated state in the film. But I’ll save all that for another post. In the meantime, I’m just glad I decided to spend the extra time on this. Confession: I’d never actually done a full-on organic model like this, start to finish, from base mesh to sculpting to retopo and normal baking. It’s really boosted my confidence!
On a more serious note, I’m sure the recent months, weeks, and days have been very difficult for a lot of you. Sending lots of love, with the hopes that we will live to see – and create – a better tomorrow together.
* I’m not an expert in topology and edge flow…if you are, I very much welcome your critique! I’m sure I overcomplicated parts of this mesh, and there were a couple of hidden areas where I decided to just cut my losses and learn from my mistakes next time. The wings feature some staggeringly bad topology – spiral loops, super-squashed quads, and even a lone triangle – but I didn’t care much because these are almost entirely hidden by the feathers. They don’t even have any detail sculpted on them.
Let’s return to my efforts with the separate model of the grand staircase from the first two films, as described in this post. With mockups and tests out of the way, it’s time for a real attempt at modeling the grand staircase! All of the flights of stairs in that room (other than a few at the bottom) have identical designs and dimensions, so I’ll be able to do a lot of duplication here. We’ll start off simple:
Cool. Next comes the room itself, or at least a very basic start at representing its shape. Starting to duplicate some elements, throwing in some basic lighting and coloration…
Yeah, this is gonna work. I decided from the get-go that I wanted this side project to be geared toward Blender’s Eevee render engine, rather than the slower but more realistic Cycles engine I normally use. Makes it a lot quicker to churn out renders as I go.
I started messing with the animation early on. This adds a whole different level of complexity to the project, since the motion of the stairs also affects the configurations of the handrails…and typically when one flight moves, another has to move to get out of its way…but the flights can’t all move simultaneously without colliding into each other…yeah, it’s tricky. Still, I was able to get the first few flights working with fairly minimal “cheating” – here are two views with all the swiveling stairs (so far) in their two main positions.
To help you get oriented, the long landing at the bottom right (with the baluster shadows on it) is where Harry and friends first emerge into this room. I just haven’t built the archway through which they enter, or the rest of the set beyond. The first render reflects the way the model was built; the second reflects the alternate positions after the stairs have rotated.
One thing that helps with this is that I’ve activated backface culling for the room itself. In computer graphics, each surface “faces” a particular direction; we call this the normal. Ordinarily you can see the surface from either side, but with backface culling, you can only see it from its “front” side. I built the room so its normals all point inward, which means you can always see into the room, no matter what angle you’re at.
I paused work on the staircase to switch back to some of the other stuff I’ve more recently posted about, and that’s when I hit a snag…another fan turned me on to some old issues of Cinefex magazine that describe “an eighth-scale, forty-foot miniature, laid on its side to aid construction and photography” (#88, regarding the first film) and “a 40-foot-long staircase miniature built previously” and reassembled as it was before (#93, regarding the second film).
This stumped me. Hard. The model was indeed laid on its side, but at 1:8 scale, the various real-world items strewn about in construction photos would look much, much larger than they do. And if the miniature still measured 40 feet along its longest side at 1:8 scale, that would make the “real thing” 320 feet tall…and by my calculations, it should only be in the low 200s.
Ultimately, I’ve decided to press forward with my original dimensions, essentially disregarding the Cinefex figures. My best hypothesis is that the reference to 1:8 scale is incorrect – probably a misreading or misremembering of 1:3 scale – and the 40-foot figure isn’t the distance from the room’s bottom to top, but from the open wall nearest the Great Hall to the opposite wall with the large window. That math actually works perfectly if the scale was indeed 1:3.
So I continued building the rest of the flights of stairs. It turns out a little more “cheating” is necessary than I originally hoped…some of the balustrades are going to have to magically pop out of nowhere. But then again, the castle is magical. And the only alternatives are to leave unprotected ledges 200 feet up (yikes) or to have some of the balustrades sweep right through the landings, knocking off any students in their way (yikes again).
In any case, I’m mainly focused on the configuration in which the model was built; all the stair movement was digital (other than the one full-sized flight on the set that actually moved). The movement is just a bonus. With all the flights in place, it looks something like this:
The walls, floor, and ceiling are still just placeholders, really, and I haven’t added the lamps below the landings yet. But the stairs themselves are all accurate! Notice how they form two unconnected spirals that switch sides at the top and bottom. In a future post, we’ll add more detail to the rest of the room, and maybe some less generic materials. Then come animations and flythrough/around videos!
Golden eagles and moving staircases can get frustrating. Sometimes you just need to return to your comfort zone and make some turrets. That’s what led me to spend some time (for once) on a version of Hogwarts that’s NOT the one from the third film! We’re going all the way back to the beginning, to a simpler time before the back of Hogwarts got its elaborate clock tower and courtyard. We’re going back to Harry Potter and the Philosopher’s/Sorcerer’s Stone!
In addition to giving me some relief from the project’s more challenging tasks, this gave me a chance to play a bit with this project’s whole primary purpose: providing 3D comparisons between different versions of the model. So I built a new version of the quad’s outer wall, but in its original state, before the hospital wing and clock tower and so forth were added for Azkaban. It’s very difficult to find information about this area of the original model, but I think I’ve been able to get a pretty close facsimile:
Still woefully incomplete, of course, but the cool thing is that I could keep the camera in the exact same spot and render a direct comparison with the (also incomplete) POA version:
This is the kind of stuff I want to get into when the project is reaching its final stages. I’d even like to let the camera glide slowly around the model as things change from film to film…I think that would be visually appealing and very informative.
(Now’s also as good a time as any to point out that I’m now on Instagram; I don’t necessarily post a lot, but feel free to follow there as well if you’d like!)
Anyway, no idea how long I’ll be working on this SS version of the castle right now; I’ll have to get back to those statues sooner or later. We’ll see what my next post ends up being about!
Prisoner of Azkaban‘s clock tower courtyard has a large fountain in the center, featuring arched pediments and four statues of birds eating snakes. [EDIT: Many thanks to bentarr1 for pointing out that the golden eagle devouring a rattlesnake is an important symbol in Mexican culture, ostensibly a tribute to Alfonso Cuarón’s nationality.] Like the rest of the courtyard, the fountain has seen better days – whole chunks of it have crumbled away. This makes for a different challenge than the rest of the castle, which has an aged look but hasn’t actually fallen apart.
Thanks to a variety of folks who’ve taken photos of the technical drawings at the Warner Bros. Studio Tour, I’ve got a lot of detailed reference on the top part of the fountain, so I decided to start there. The fountain will be built in complete, pristine form first…then I get to go in and destroy it. (I’ll make a copy, don’t worry!) I started with some of the arches:
The intersecting curves are tricky to stitch together. I’m again very grateful for Blender’s TinyCAD add-on, which makes the job somewhat less painful, especially because there’s a lot of it here:
It looks great in gray, but it’ll look even better when I apply my standard stone texture from the castle, right?
Ew. Never mind. Looks like I’m gonna need to create a new material specifically for this fountain. I’ll put a pin in that for now. Back to plain gray as we give this thing some rotational symmetry:
Dang, kinda makes me sad that they went and destroyed half of the thing…the pre-eroded design is really pretty! Anyway, the top part’s also got a lot of detail, but this pediment’s no impediment:
Then all that’s left for the top part is to add some pinnacles to the corners – interestingly, not quite the same design as the pinnacles on the Great Hall, or even the nearby clock tower entrance. Voilà:
I dig it! Next up will be the base of the fountain, the columns, the bird statues, and the texturing – not necessarily in that order.